How to Mount Antlers on an Acrylic Base
I’m not a hunter.
I’ve never hunted. I don’t own anything camouflage. I’ve never worn anything in a hue resembling hunter orange.
Although, I did have a pair of fluorescent yellow leg warmers in 4th grade.
I do own a set of deer antlers though.
My brother gave them to me years ago.
I don’t know where they came from. Or how old they are. I have no answers on that front.
I just liked the antlers.
If you’re an antler purist (is that a thing?) then stop reading now because it will definitely seem blasphemous that I painted the antlers gold at some point.
What can I say? I liked the juxtaposition.
I never wanted to hang the antlers on a wall. I just liked how they looked on a shelf.
The only problem is the antlers always sat on the shelf at a tilted angle because the skull part was not flat. Also, over time, the underside of the skull became increasingly fragile and parts would break off. That’s as disturbing as it sounds.
I needed a way to protect the skull and hopefully make the antlers stand upright as well.
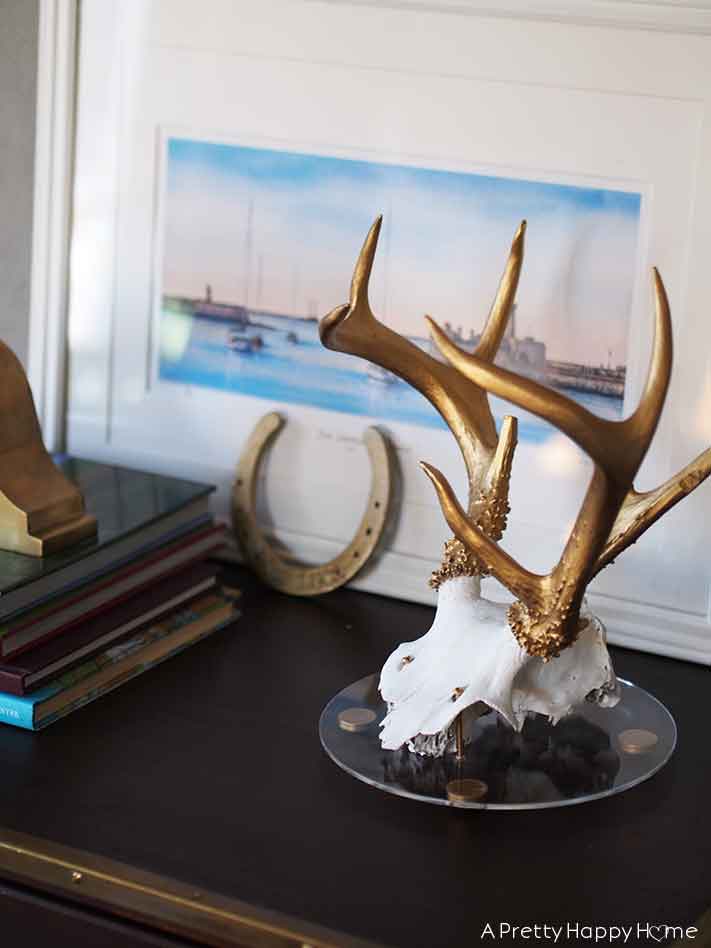
Ultimately, I decided to mount the antlers to an acrylic base. It was such an easy project that I don’t know why it took me so long to figure out this solution.
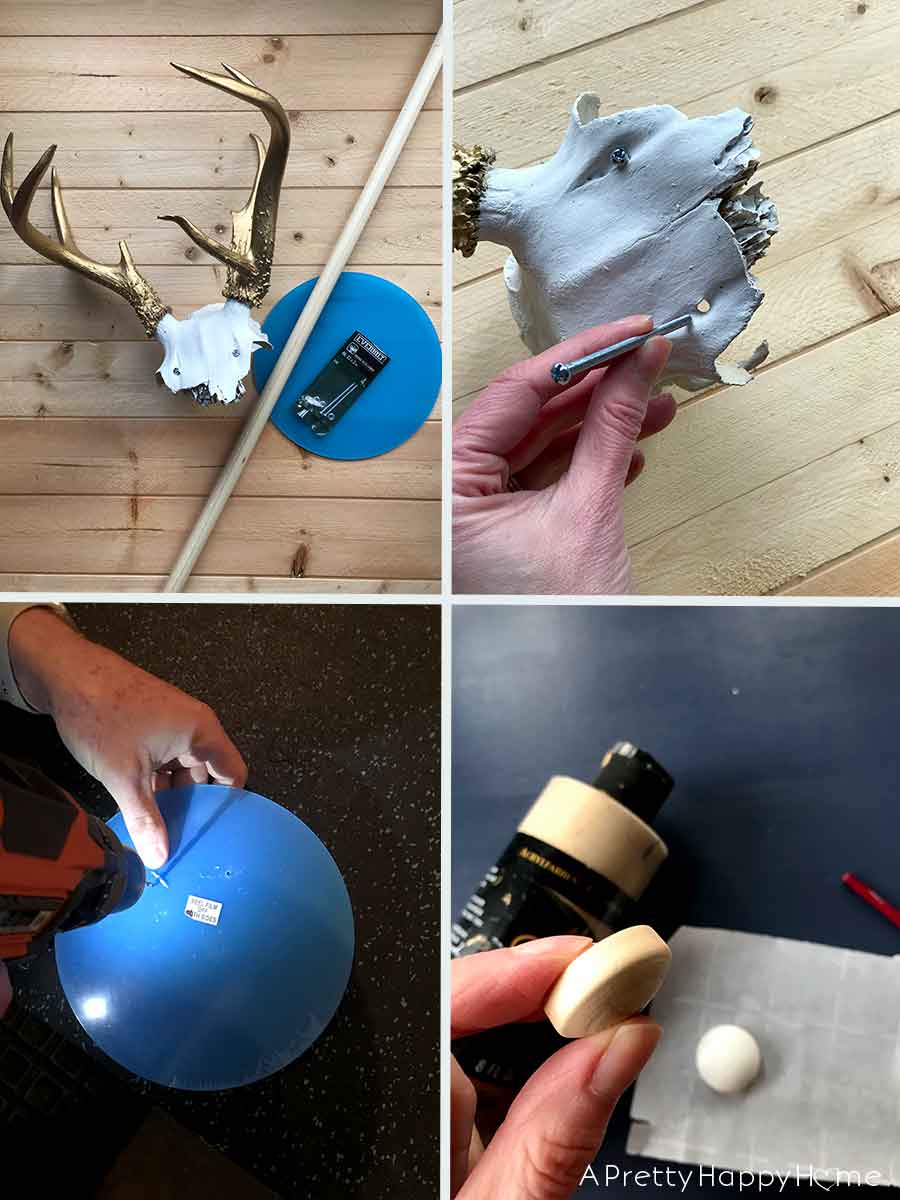
You’re going to need an acrylic round (or you could use a wood round), 2 bolts and 2 nuts, and a drill.
You’ll also need to make “feet” to raise your acrylic base up. I was originally going to make those with a wood dowel cut into 1-inch chunks, but decided to use wood plugs from the craft store instead. Optionally, you can paint or stain the wood feet.

My antlers already had two mounting holes drilled in the skull. This made my project much easier. I just needed to get bolts the right size for this project.
That required a trip to Home Depot with my gold-painted antlers in hand. I figure it probably wasn’t the weirdest thing they’d seen in the store that day.
Probably…but let’s not ask them.
It should not shock you if you’ve read this far in the post that I chose to paint the bolts gold to match the painted antlers. Do what works for you!
After that, mark where on the acrylic base you want to drill your holes. We left the protective film on the acrylic to try and prevent splintering. It sort of worked, but I’m sure there’s a better solution. There’s the tiniest amount of splintering that is hidden by the hardware.
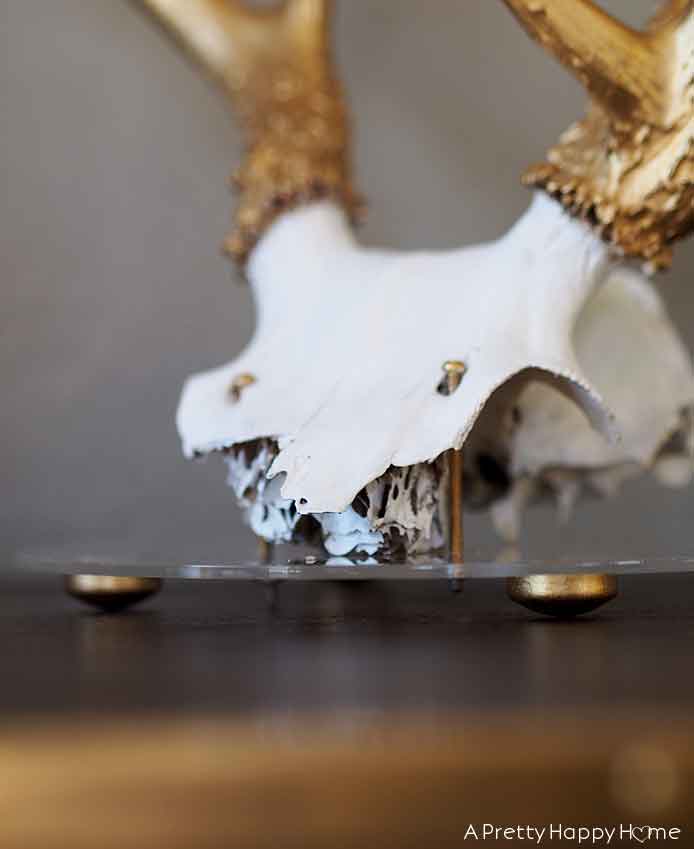
Insert your bolts through the skull and the holes in the acrylic. Then secure on the underside of the acrylic with the nuts. Due to the angles of the holes in this particular skull, one of our bolts is not completely vertical, but we were still able to secure it. Our bolts ended up being a little bit too long, so we used wire cutters to trim the bolt to size.
The reason you need feet for your acrylic base is you need to raise the acrylic up so there is clearance for the hardware underneath. Otherwise, your base won’t sit level.

I painted four wood plugs with gold craft paint. I did seal them with Mod Podge for added protection.
Then I used heavy duty glue to carefully glue the wood plugs to the underside of the acrylic base. Make sure you select a glue that will adhere to a smooth surface AND that dries clear because you will see it from the top.
I used the wood plugs partly because I had four of them on hand. Also, I realized that the wood plugs were already a uniform size, which took the work out of making sure everything was level if I was to make my own feet from a dowel.
Alternatively, if you want to spend a little more money, I think acrylic mounting hardware (like these) could be used as feet too and would give the project a nice modern feel.

The cost of the acrylic base and bolts was around $8 total, so this was an inexpensive project. The longest part of the project was waiting for the glue to dry!
If I could change one thing, I would have bought a thicker piece of acrylic to give the base more substance. Live and learn.
This was one of those projects that was so easy to do that I wish I would have done it sooner.
To me, the antlers look like a sculpture now. Mounting the antlers on a base turned this unfinished project into a piece of art and I’m pretty darn happy with how it turned out.
Item Used to Mount the Antlers on an Acrylic Base
8.5 inch Diameter Acrylic Round Disc (Make sure you measure before ordering! The size you need will be based on the size of your antlers.)
Wood Head Plugs (Should be available at any craft store.)
Elmer’s ProBond Advanced Professional Multi-Surface Weatherproof Glue (This is the glue I used. It ‘mainly’ dried clear except for on one plug where I had excess glue. So, test before you use. It’s super strong though.)
Everbilt Round Head Combo Bolts – #6-32 x 3 inch (Comes in a package of 4 with the nuts for just over a dollar at Home Depot. Again, the size you need will depend on your specific antlers. So, check before you buy.)
Gold Acrylic Paint – It’s not the style for everyone, I acknowledge. Personalize this project to suit your decor! Spray paint would work great too, I just didn’t have any on hand.
Alise 3/4″ Dia x 1″ Ln Store Sign Holders Screws Wall Mount Hardware Advertising Glass Standoff Nail,QS519G-8P Stainless Steel Golden Finished (If you don’t want to use wood feet for your project, this acrylic mounting hardware should work as feet and it would look very professional and modern.)
*Affiliate links used. I get credit when you use one of my links to make a purchase. It doesn’t cost you one cent extra, but it does help me keep the lights on on this blog. So, thank you!
Thanks for hanging out with me today! Here are some other posts you might enjoy.
What a Hardware Store Looks Like in Ireland – From that time we lived there for two years
Bird Nest in a Shoe (We have more of a connection with nature than I realized!)
Speaking of birds, Rusty Machine Turned Bird Bath
Hide cords behind a desk with a curtain (Cords are the bane of my existence.)
Good Luck Horseshoe DIY (as seen in above photo)


