
Carriage House Interior Makeover Reveal
Thank you for following along on this Carriage House Interior Makeover series. (Catch up on Part 1 and Part 2.) Today is time for the reveal of the space!
Makeover reveals make me uncomfortable. It’s not that I’m not happy with the work we’ve put into a space, but a reveal implies something final to me. This Carriage House interior makeover isn’t even really done yet.
It’s just done for now. But that’s still a reason to celebrate!
I’m going to assume I’m not the only one who feels this way about their home, especially one you are continually working on.
As a reminder, here is what the Carriage House looked like in 2019 when we bought this property.
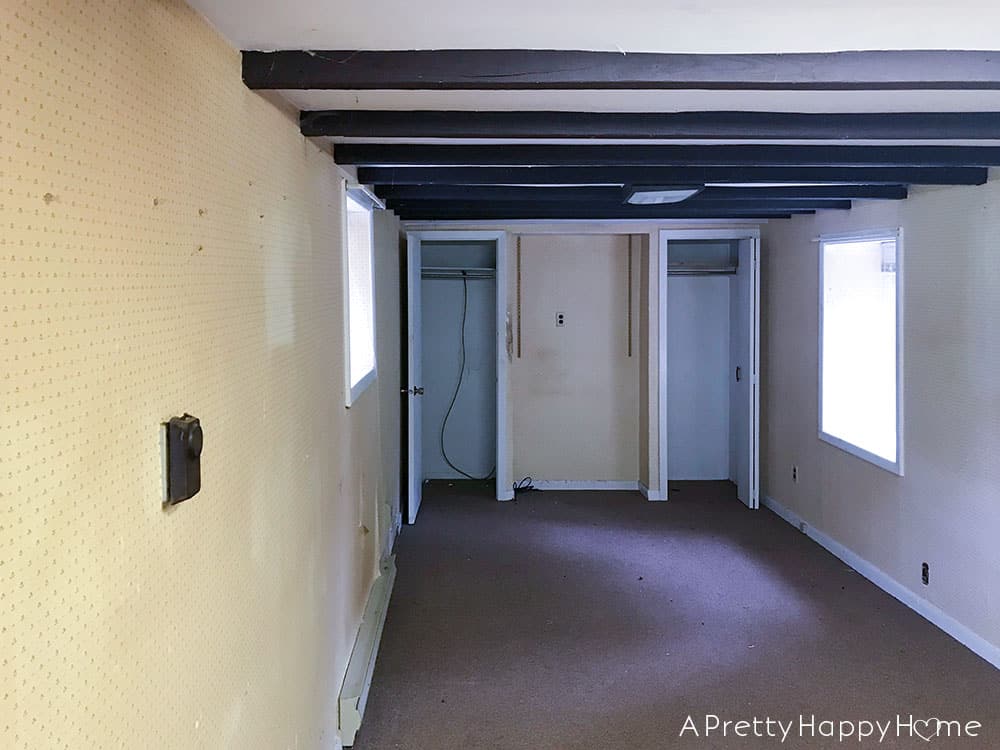
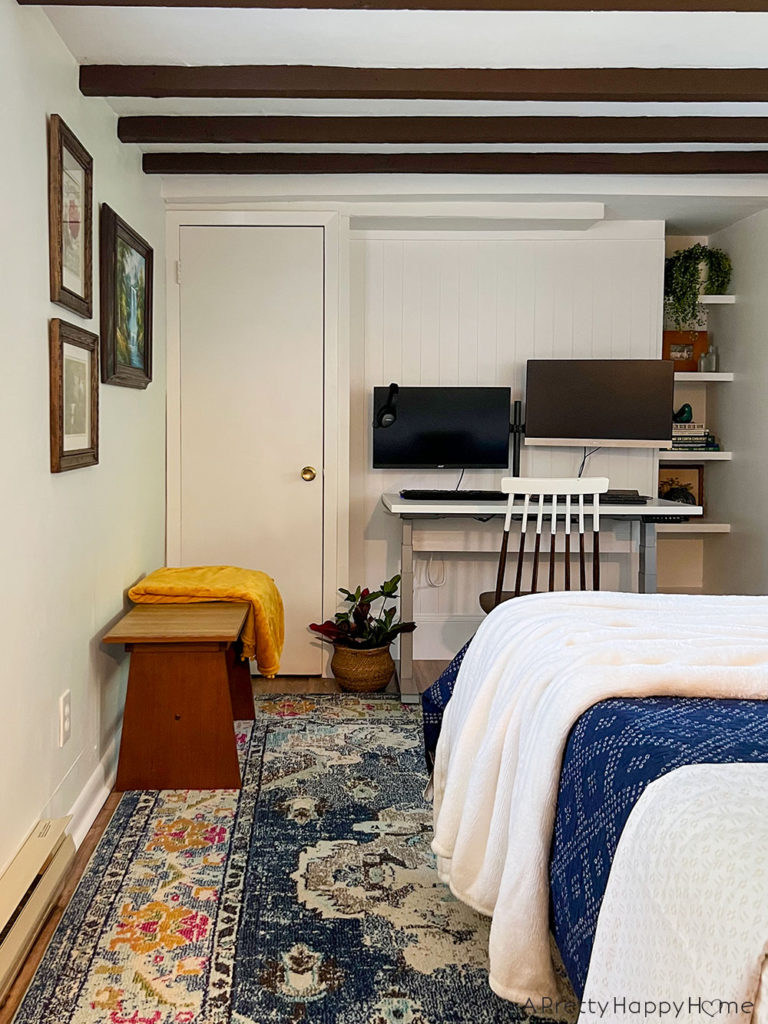
Here is that same view today.
Cleaner, brighter, and a whole lot happier.
The Carriage House is a long, narrow space. It’s only a little over 8-ft wide! (The rug on the floor is an 8×10.)
Eight feet is bigger than a Harry Potter-sized cupboard, but not a whole lot to work with when you’re trying to cram at least a queen-sized bed in the space.
We had to get creative with the space planning to create a work zone, a sleeping zone, and an eating zone.
The far wall of the Carriage House was designed to hold the standing desk provided by Handy Husband’s work. He mainly works from home these days. I’d like to thank his company for providing their employees standing desks (it raises and lowers from sitting to standing height), but it’s not the prettiest.
We have a closet to the left of the desk that holds all the computer components and shelves to the right of the desk for storage and decor.
The sleeping zone for the Carriage House interior makeover threw us for a loop for a while.
There’s only one wall that logically makes sense to place a bed. If we put the bed on that wall, it’s hard to walk around the end of the bed. There are only about 16 or so inches of clearance.
We considered doing a Murphy bed, but the ceiling isn’t tall enough for the bed to move from the upright position down to the ground. Quite the conundrum, right?
In the end, we decided to sacrifice the convenience of our guests (sorry!) and turned the bed so that one side of it is against the wall. I guess couples who stay with us will just have to fight over who is sleeping against the wall and who isn’t. Again, sorry!
The new bed configuration makes the walkway to the office zone much easier to access with approximately 36 inches of clearance now.
Remember, Handy Husband uses this office every single work day. We only have guests a few times a year. It made more sense to create a space that prioritized his needs.
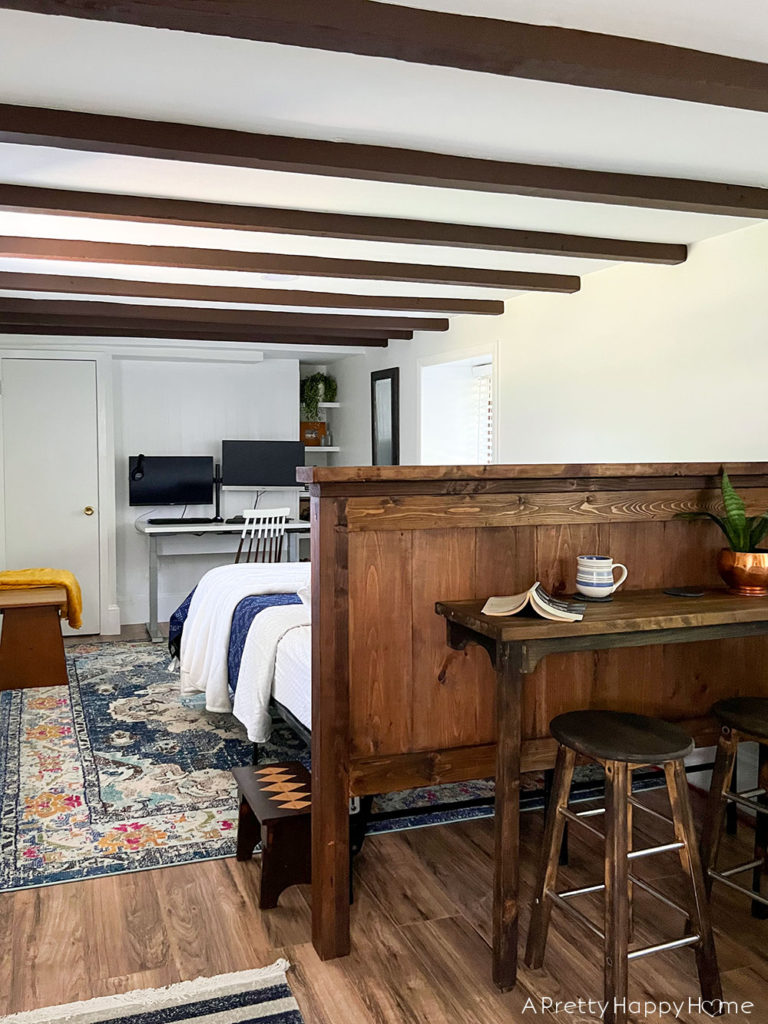
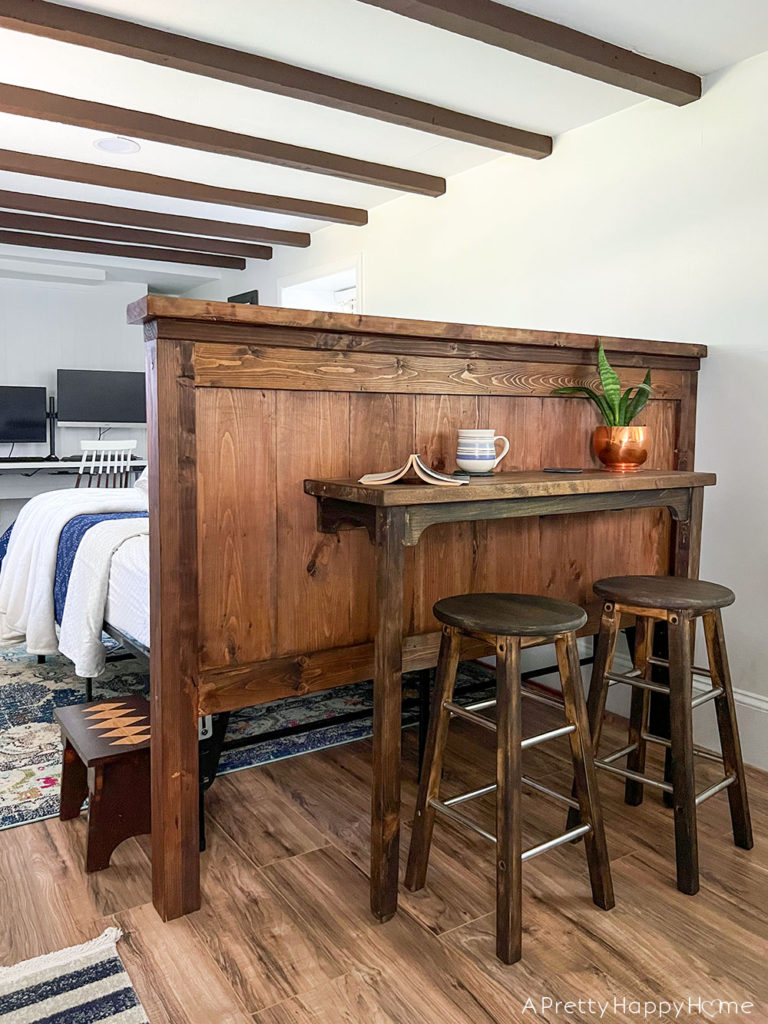
Floating a bed in the middle of a room is a little bit weird unless you give it a purpose. Ours is serving two purposes.
First, as a room divider. We purposefully placed the headboard at a height where it divided the room but didn’t block the entire view of the space.
Second, the back of the headboard became a bar and seating area for the kitchenette. We didn’t have room for much else, so this solution worked out well.
Here’s a fun fact! The wood for the bar top came out of an old piano we repurposed.
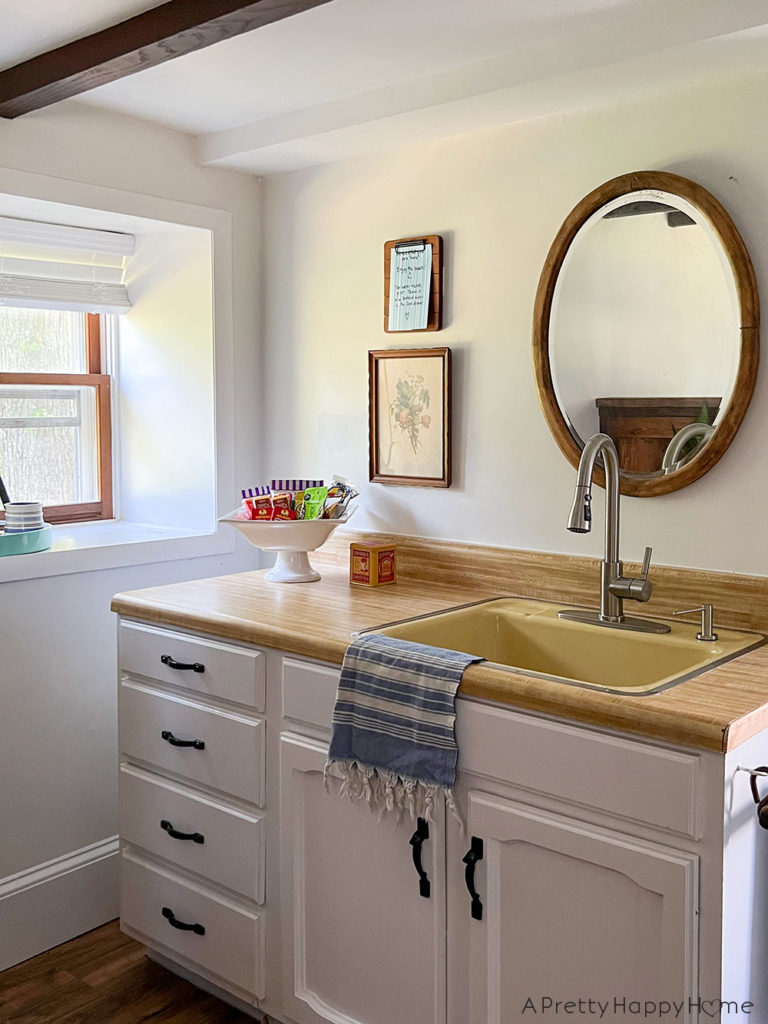
The kitchenette of the Carriage House used to look dark and dated.
Plus, the overhead fluorescent light was very obnoxious.

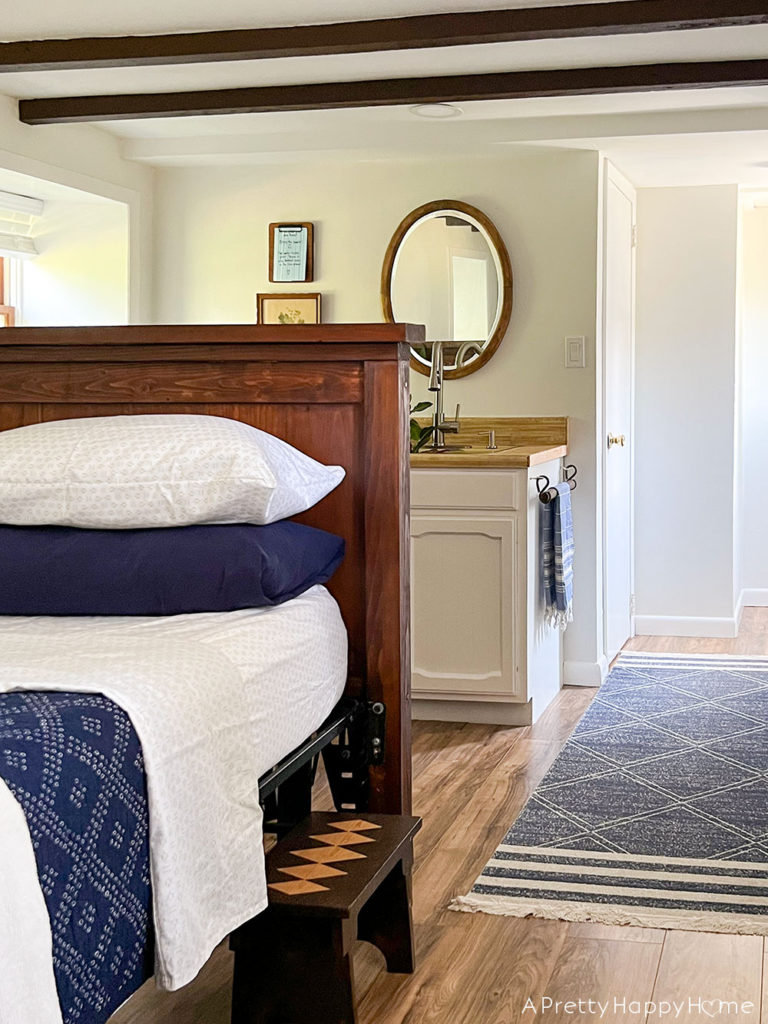
Only three things were changed with the kitchenette.
We painted the cabinet and hardware, switched out the faucet, and removed the upper cabinets.
We installed a mirror over the sink in the kitchenette because the bathroom is tiny. This gives our guests an additional place to get ready for the day.
The space is still dated, but those small changes do make a difference!
As I said at the beginning of this blog post, our Carriage House interior makeover isn’t done but it is done for now.
There is still work to do out here with the trim, doors, plumbing fixtures, and HVAC. Someday, we might get fancy and even add a refrigerator to the kitchenette. That would be a game changer!
All that said, we are so happy with how far the Carriage House interior has come in the last few years and excited about our future plans and ideas.
Some renovations happen in one fell swoop and others, like our Carriage House interior makeover, happen slowly as time, money, and energy allow.
Either way, the improvements you make to a space can make you fall in love with your home a little more each time.
Room Sources:
Headboard: DIY (similar)
Sheets: Target
Paint: Behr Arcade White
Stools: Thrifted
Bar: DIY
Rug: Safavieh
Runner: Thrifted
Turkish hand towels: Amazon
Coverlet: (old) Target
*affiliate links in this blog post*
Are you a slow renovator too? I’d love to hear your stories. You can always comment on this blog post (I have to approve it first before it appears), email me here, or reach out via Instagram or Facebook.
I know your time is valuable and I’m so grateful you chose to spend part of your day here. Thank you. If you’d like another blog post to read, try one of these:
Carriage House Interior Makeover Before Photos


You May Also Like

Adding To Our Concrete Pool Deck Ourselves

How to Make Staining EASIER
