Building Fieldstone Stairs: Part 1
My friends, it is time for our next project, building fieldstone stairs!
Have we done this before? Nope.
Is that going to get in the way of a good time? Maybe.
This project needs a little context, so let’s step on up and get to it.
Where will we be building fieldstone stairs?
Outside, of course.
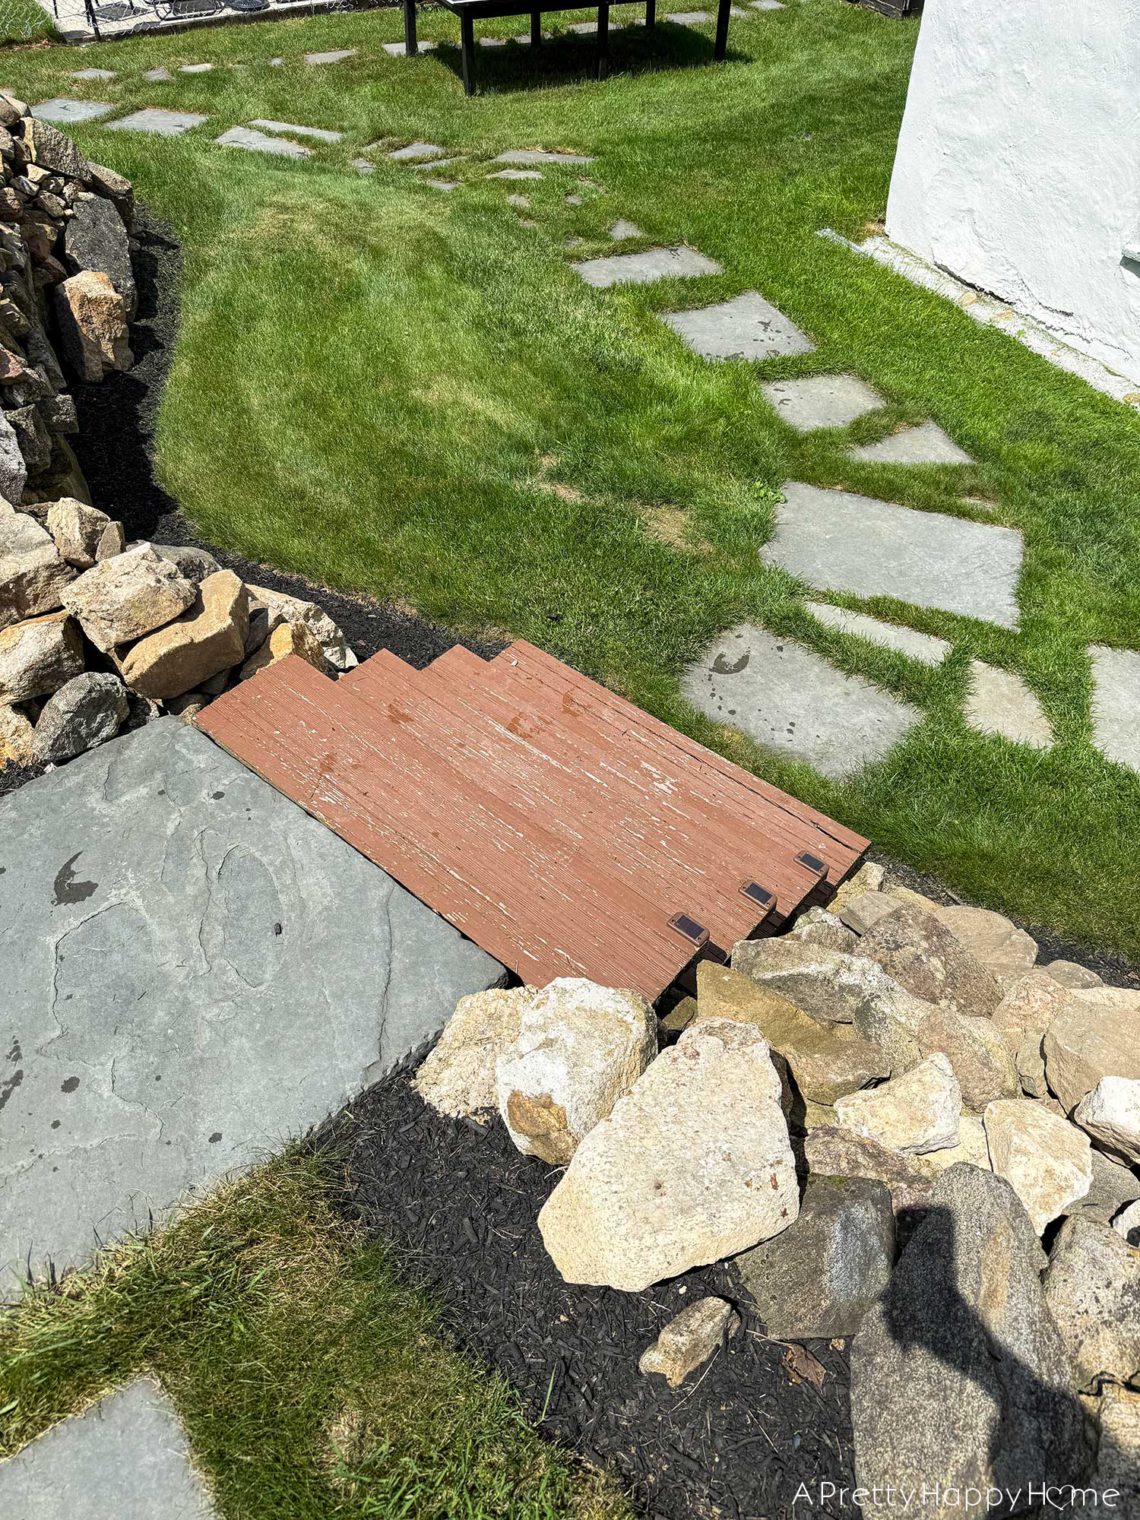
There is a set of wood stairs in our backyard (4 steps) that we walk down to get to the first floor of the Carriage House. The stairs are set in the middle of a loosely stacked fieldstone wall and below a slightly out-of-level flagstone.

Why we are replacing the old steps?
For kicks. Kidding!
The steps are rotting. That’s the biggest problem. I’ve had a few rocks propped under the bottom tread for months now to support it. If you look carefully, you can see that problem-solving in action in the above photo.
The second problem is we really, REALLY need a handrail. We have all tripped going up or down this set of stairs. I’m probably the only one who falls up stairs though because I’m special that way.
The last problem is these wood stairs are simply wedged into the earth. They are just hanging out all casual like as you want stairs that are supporting your entire life force to do. (Not!)
Now, in fairness, the stairs have leaned there for a long time without moving too much. But they can move and dirt can slide out from the hill and onto the steps. It’s a problem that needs to be addressed.
Why fieldstone steps?
The short answer is it is free. Fieldstone is located all over our property. If we ever run out of, we can dig three inches under the grass and find some more. We’re lucky that way?
The longer answer is we value using what we have for our projects. We live on a very old property where the buildings have fieldstone foundations. It makes sense to continue that continuity with fieldstone steps.
Now, to be sure, there are simpler ways to build outdoor steps, but then we’d have to buy other materials (flagstones, bricks, concrete, etc.), and I’d rather spend that money elsewhere.
Plus, it should be an interesting challenge.
Let’s take apart the wood steps!
Handy Husband is a very meticulous dismantler of things, so I had to wait very patiently while he removed every screw from the steps and made neat little piles to be reused or discarded.
I try to remember in the excitement of the moment that his method is always better in the end.
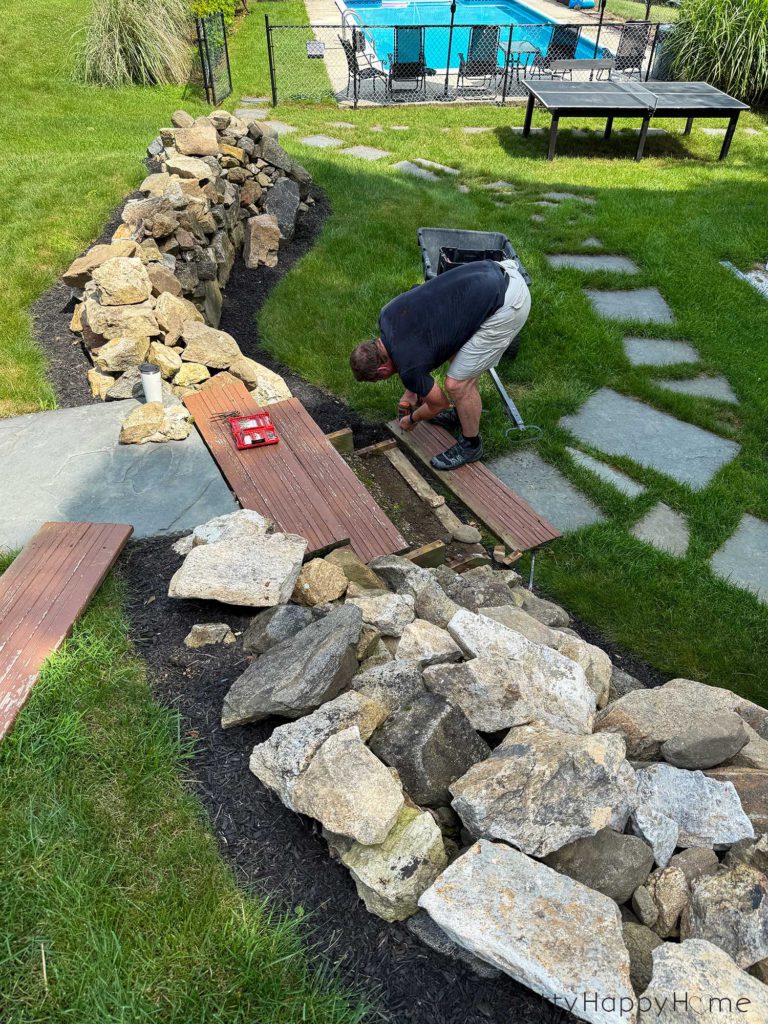
Five lifetimes later, the stairs were fully dismantled, and we were left with what looked kind of like a dirt ramp. If my kids were little they would have thought this was the greatest thing ever.
I was not exaggerating (as I am prone to do while I practice patience) when I said the stairs were just leaning against the hill. One Handy Husband-sized tug and they came out of the dirt.
Now what?
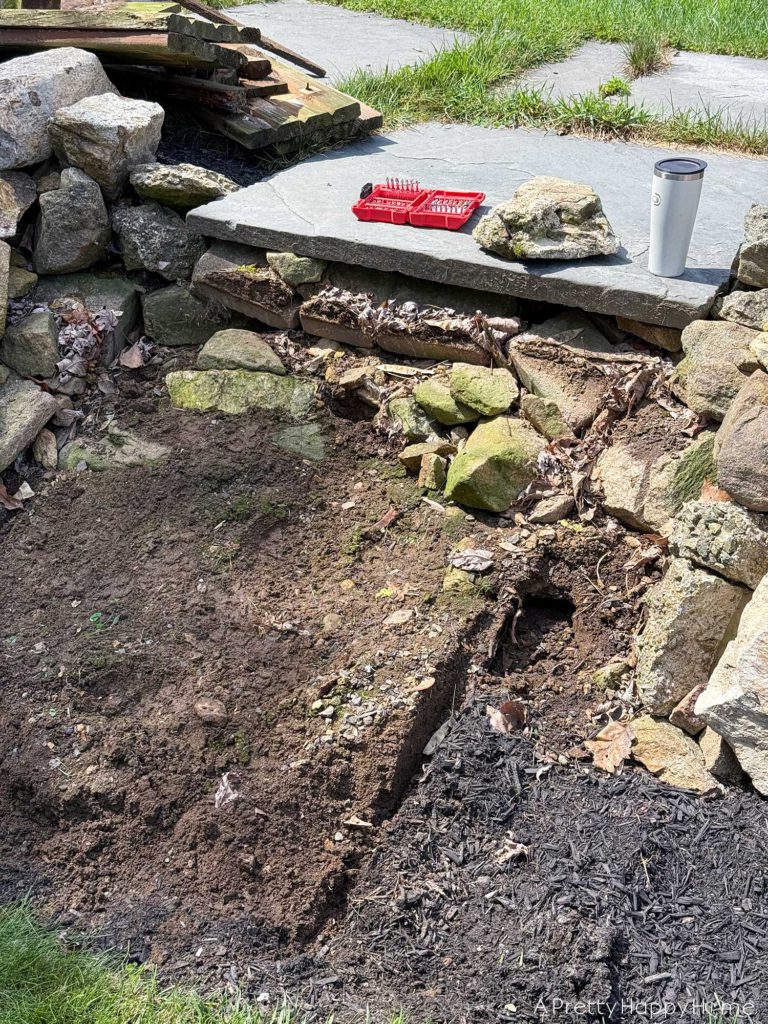
Now, my friends, we dig.
By we, I mean Handy Husband.
There’s not room for two people wielding shovels in this area. Such a shame. How will I survive?
As you can see, Handy Husband is also a meticulous digger. He separates stones from dirt. The stones get washed and stacked to be used later.
The dirt is either layered on a compost pile, or we use it to fill holes on our property where the ground is uneven or animals have been digging.
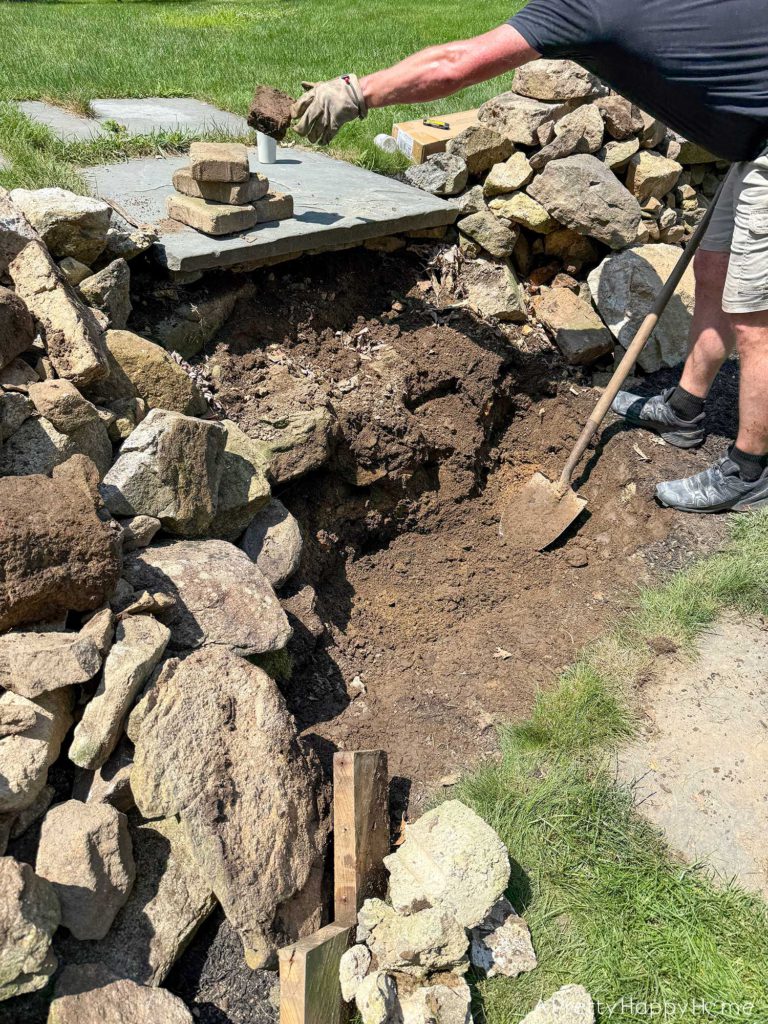
You can see how deep the area is by using Handy Husband for context. He’s 6-feet tall.
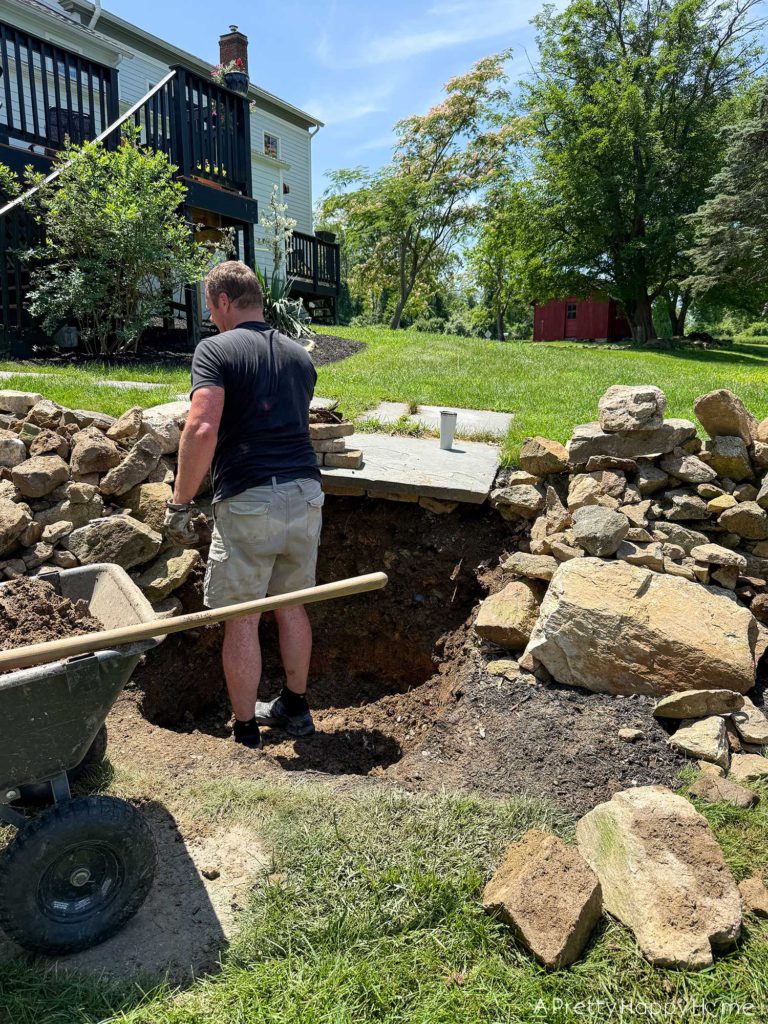
We weren’t too concerned about getting below the frost level for this fieldstone stairs project, but he did dig, maybe 14 – 16 inches, below ground level to provide a foundation or base layer for our fieldstone stairs.
Here’s how the dug out area looked when he was done.
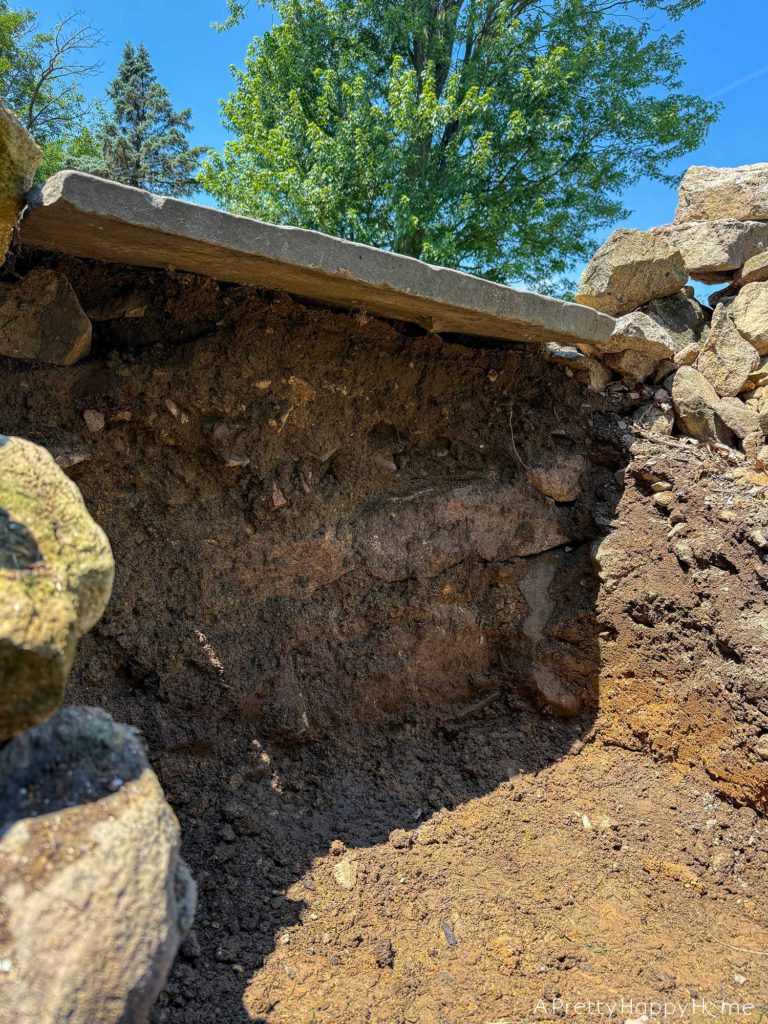
If you’re thinking that flagstone hanging over the top of the hole looks sketchy, you’d be right. It was even worse in person.
But don’t worry.
No humans or animals were harmed in the making of these fieldstone stairs. We put some rocks on top of the flagstone to weigh it down and to remind everyone this path was closed to pedestrian traffic.
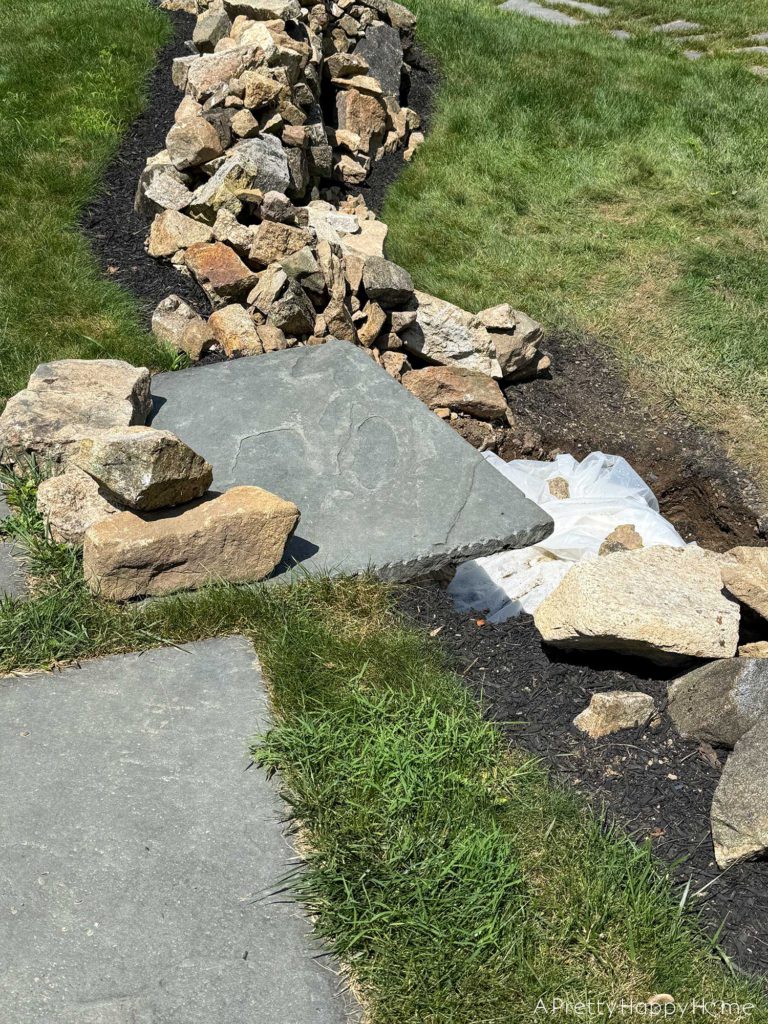
It also motivated us to get cracking with this project. We took for granted how many times a day we use these stairs in the summer to get to the pool, Carriage House, pump house, etc. and now we had to take the “long” way around.
There’s nothing like a minor inconvenience to speed a project up.
In my next update, I’ll show you how we built the stairs. I’m not sure if our method will surprise you or not. I’m just happy it is getting done!
Are you surprised we are building fieldstone stairs? Do minor inconveniences motivate you too? Please comment on this blog post, email me here, or reach out via Instagram or Facebook. I love hearing from you.
Thanks for hanging out with me for the start of another project! Here are some other blog posts you might enjoy.
Use a Cake Stand to Corral Bathroom Counter Clutter


2 Comments
Nancy B
This is going to be another fun project that “we” get to cheer you on from a distance!! Plus it’s going to be gorgeous, I can already tell.
Those “minor inconveniences ” do spur me on to resolve, but then it’s usually a why did I wait so long moment, too!
annisa
The “why did I wait so long” moments get me weekly at least. I never learn. Ha! Thank you for cheering us on from a distance. It helps!