Building Fieldstone Stairs: Part 3, The Reveal
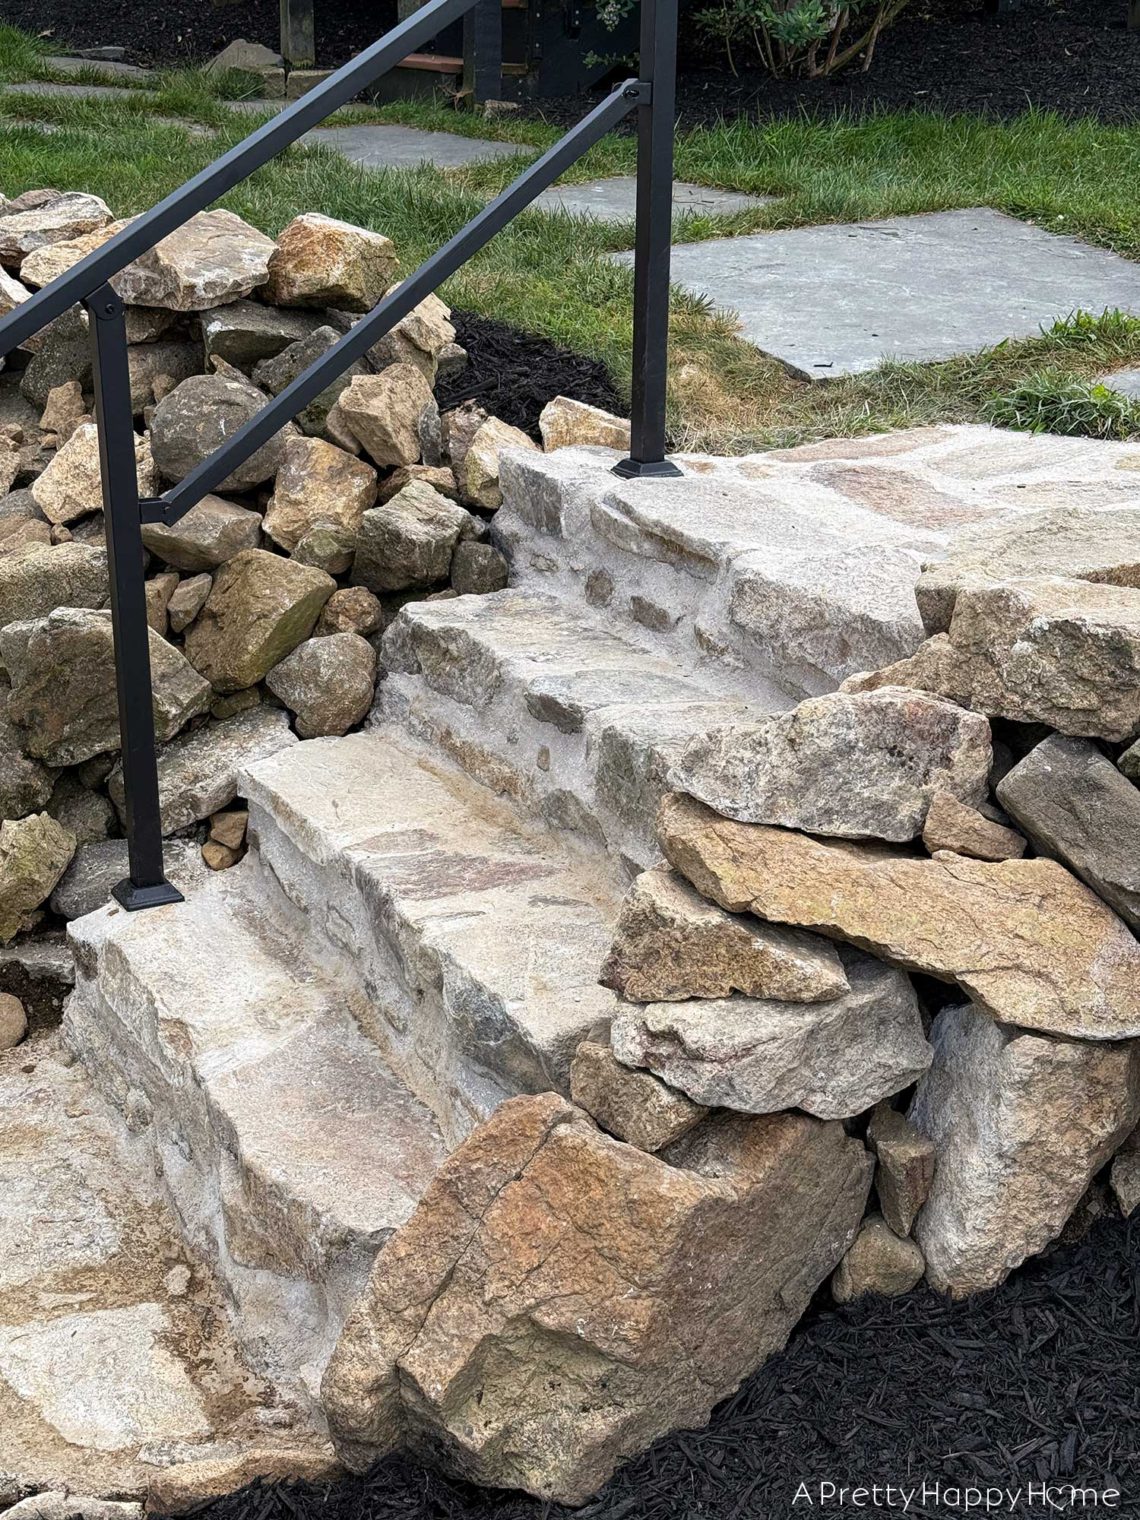
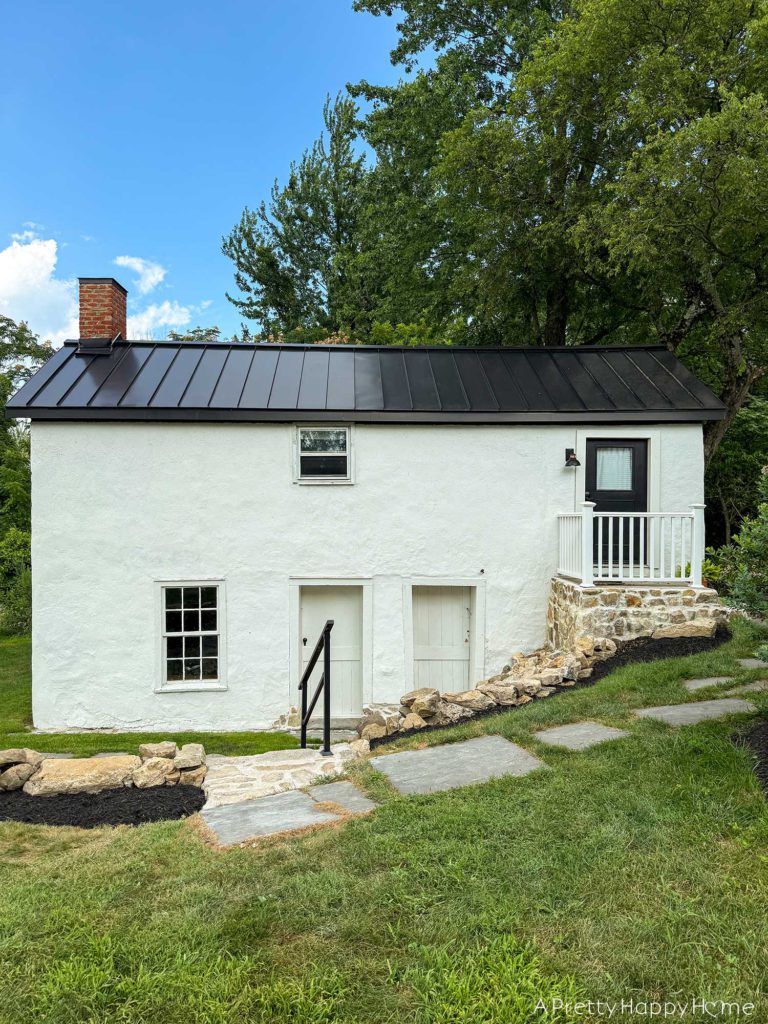
Here’s the “tada” moment you’ve been waiting for, the reveal of our fieldstone stairs.
If you’re just joining us, you can catch up on Part 1 and Part 2 of this series. It’s a rockin’ good time.
The short story is we thought we’d see how hard it would be to build stairs out of natural fieldstone. This means using stones dug out of our backyard and used in their natural state. No clean edges. No uniform sizes. No idea how it will look when you’re done.
Well, we had a vague idea.
But it turned out even better than we imagined and, believe it or not, it wasn’t the hardest thing we’ve ever done. You give me a choice of doing this or going to the DMV and I’ll choose manual labor every time.
Here are the stairs we removed for this project because tripping and falling down these rotting stairs was not the dumb way I wanted to die.

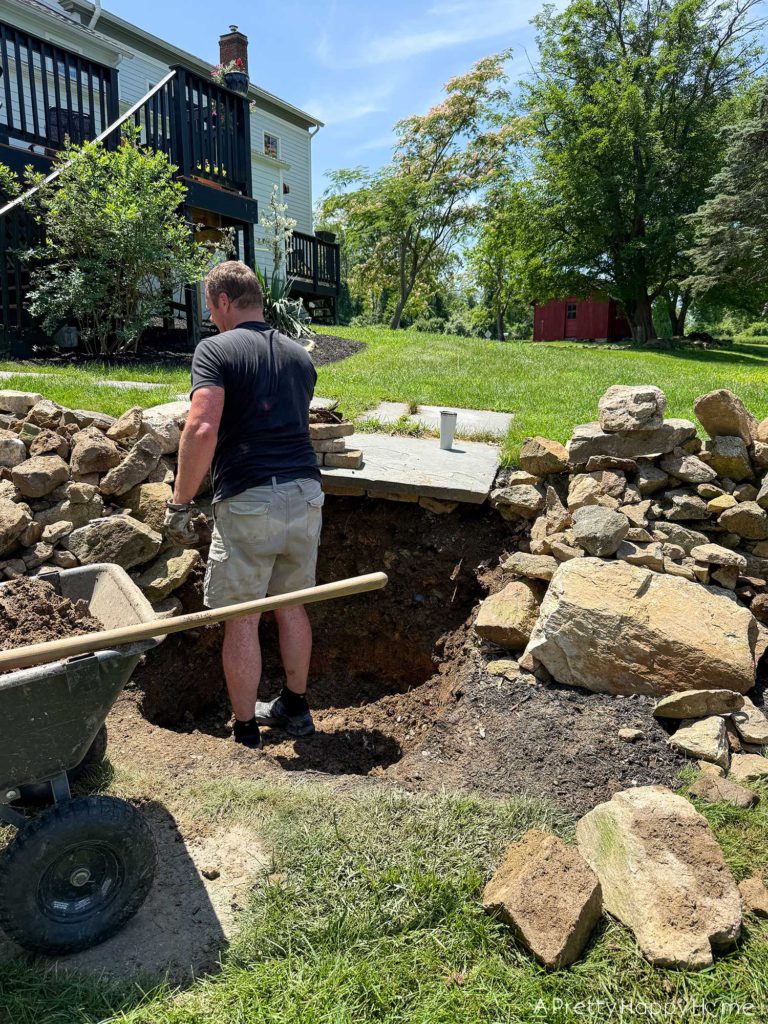
Once the old stairs had been removed, we dug out a large area for the fieldstone stairs to be built into the side of the hill. We took TWELVE wheelbarrows full of dirt out of this seemingly small area.
We’ve been spreading the dirt from this project behind our little red barn. The only problem is that the barn is located uphill from these stairs. If you’re ever interested in feeling your legs burn, let me suggest pulling a fully loaded Gorilla cart of dirt up a hill twelve times. That will do the trick.
God bless all of you who live on perfectly flat property. What’s that like? Is it delightful? I’ll bet it is. You can probably feel your legs, and I’m certain your coffee mug never tips over when you set it on a sloped flagstone path.
But I digress.
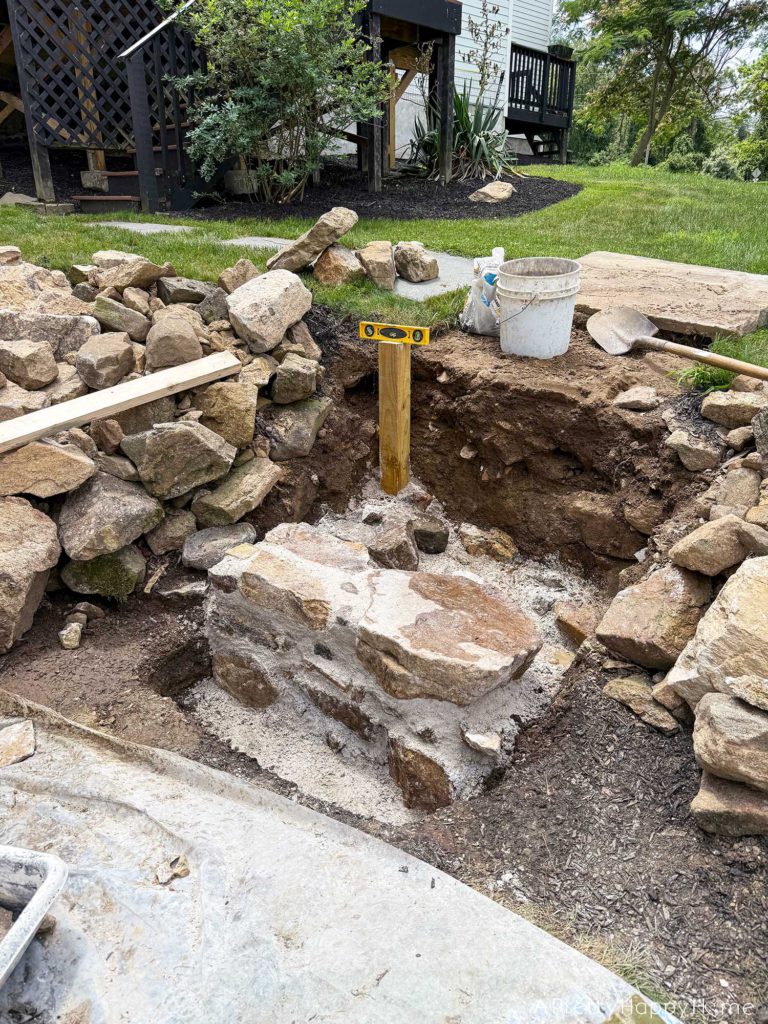
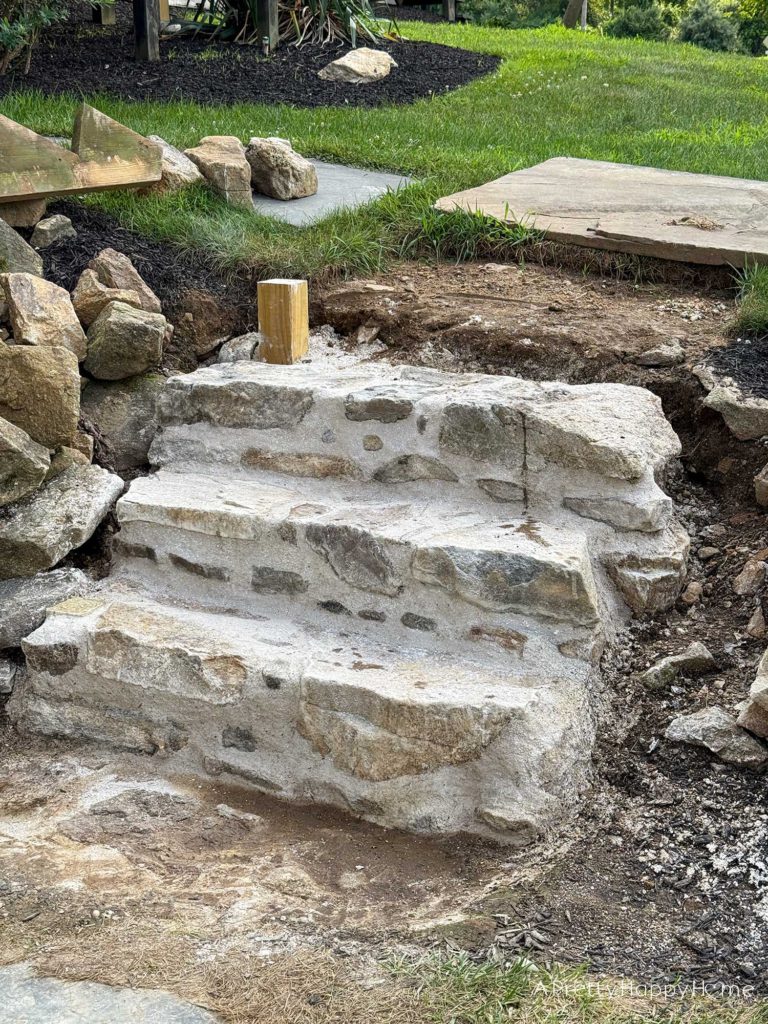
In the below picture, you can see the first step and posts for a handrail are going in.
The only visible part of each step is the first ten inches, so everything (stones and lime mortar) placed behind that line is fill. This means most of each step layer didn’t have to look pretty. It just had to be sturdy.
Frankly, that took some pressure off.
Building these fieldstone stairs was a bit like what would happen if you combined a puzzle and a choose-your-own-adventure book. Every rock placed affects what would happen next.
Should you not like the way your adventure (aka stairs) was unfolding, it was fine. It could be undone. You would just be hoping it wasn’t the heavy rocks that needed to be removed.
Spoiler: It’s always the heavy rocks.
That said, it was super encouraging to see the stairs finally take shape. The second and third step were looking mighty fine.
We were almost done with this project. Just one more step to build. The end was in sight!
But wait.
It’s not one of our projects unless there is an escalation somewhere, and this project had been suspiciously going according to the mutually agreed upon plan.
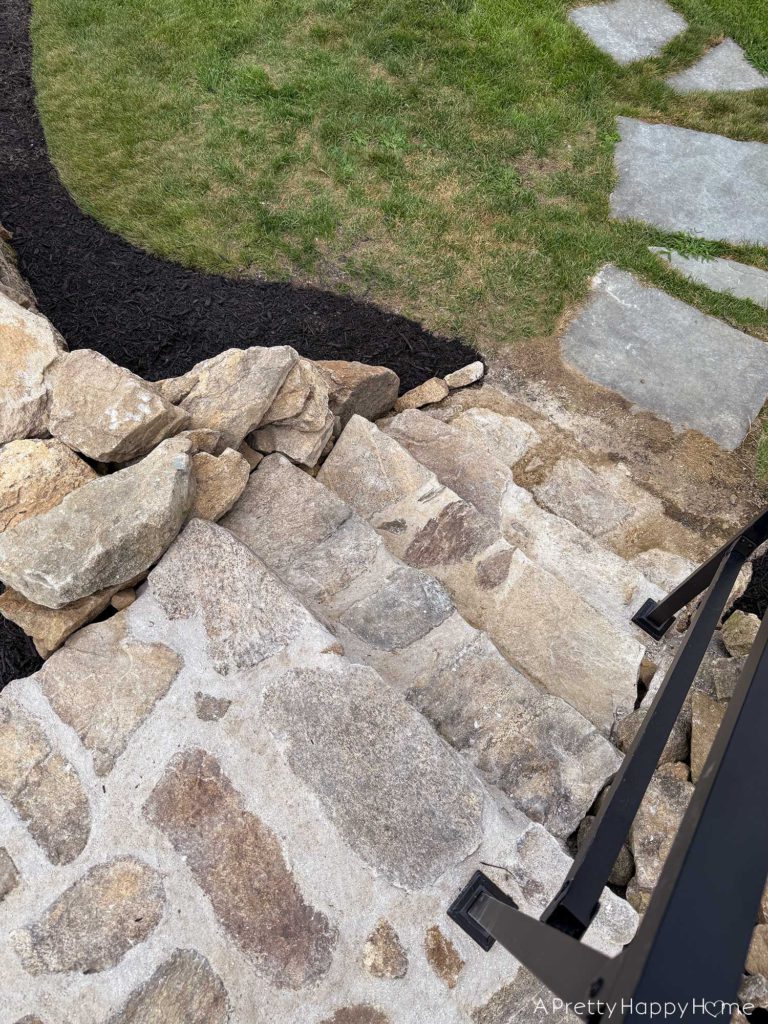
Then Handy Husband decided early one morning that the last step should really be more of a landing. I’m not sure if that was his true motivation or if he just didn’t want to reset the giant flagstone into place.
Either way, he dug a hole for the landing which meant we were committed now! One 300-pound rock and a few smaller ones later, we had the base of the landing situated.
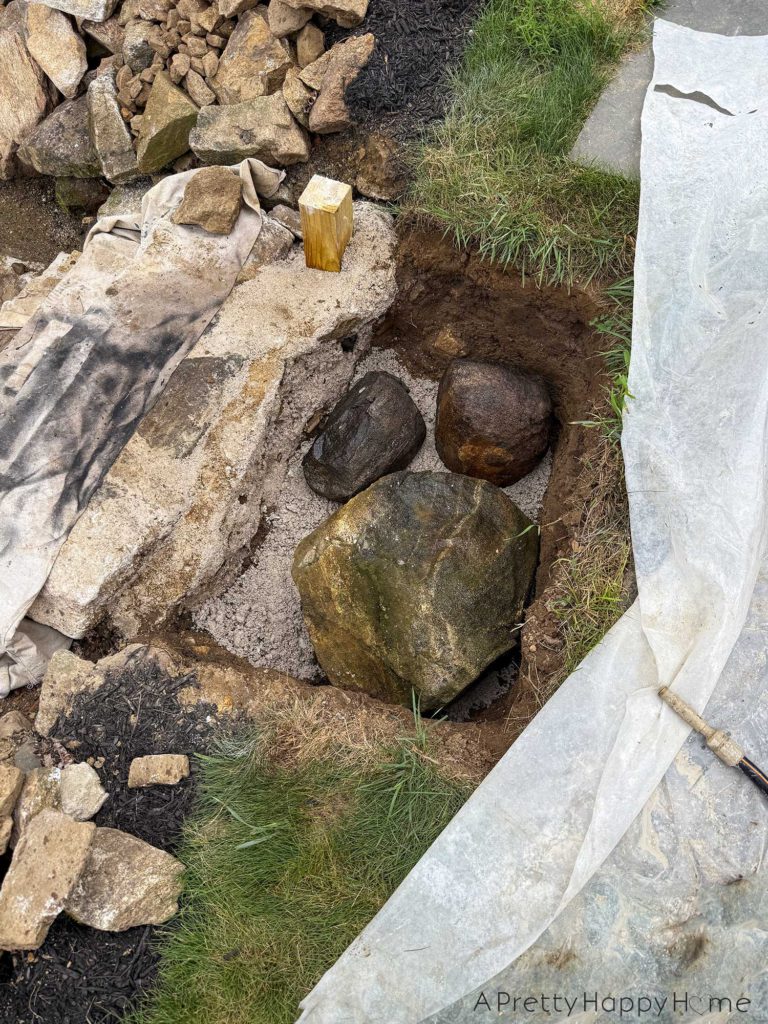
I’d say the landing was the perfect amount of escalation for this DIY project.
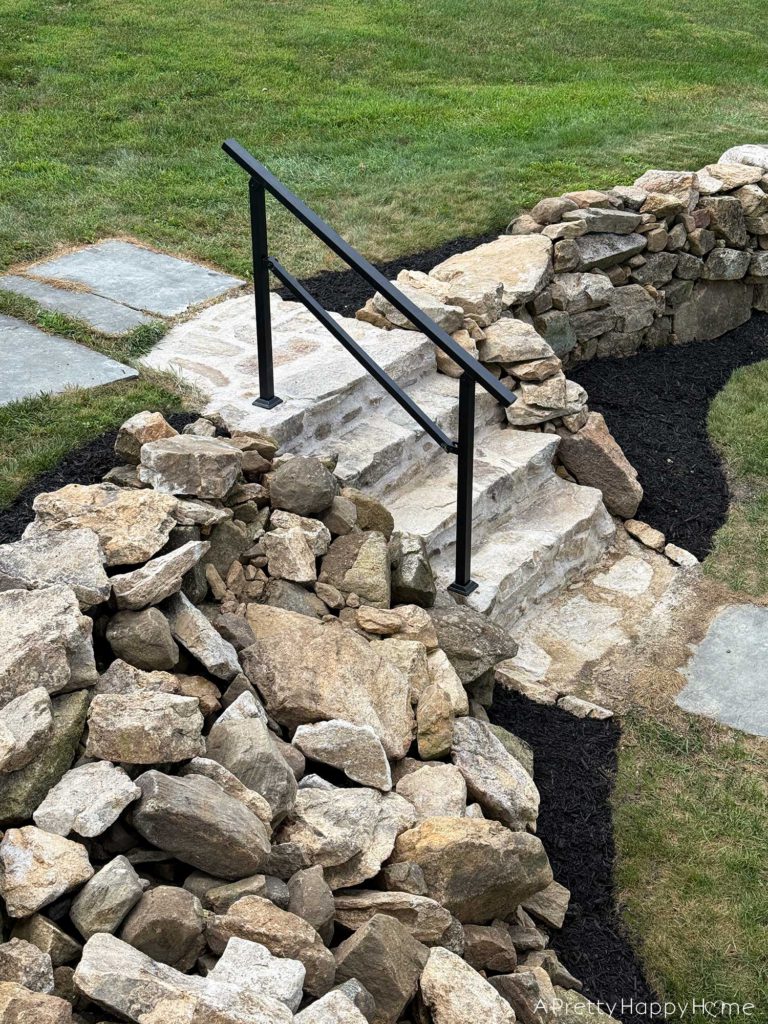
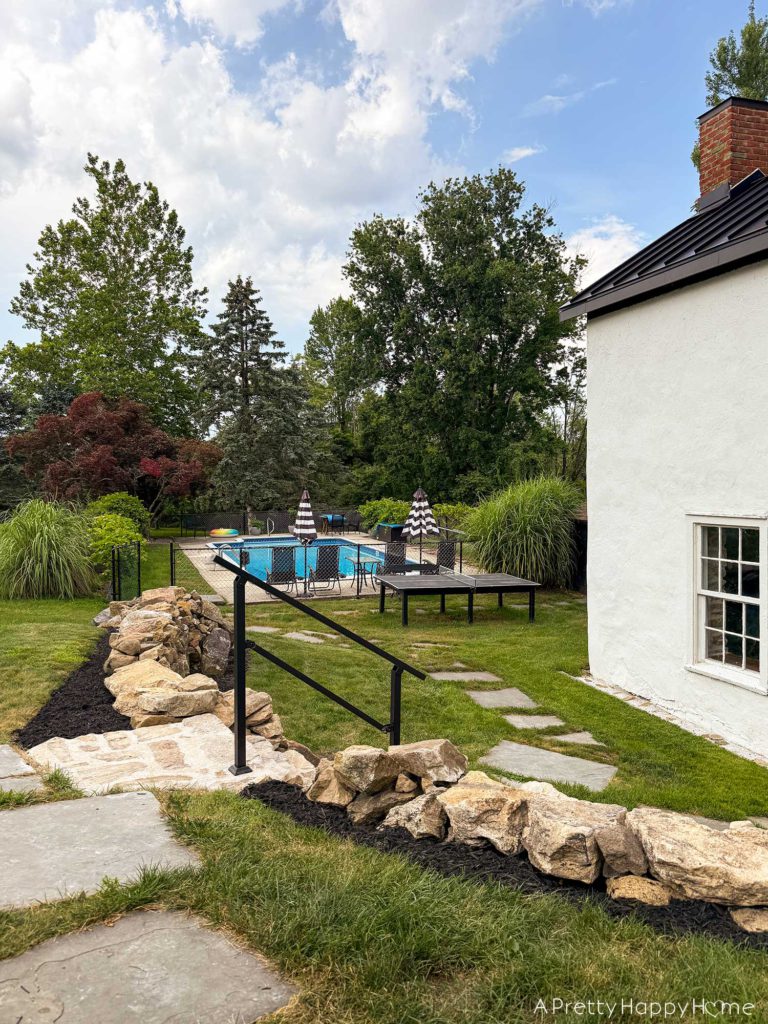
It turned out really cool and made the stairs look more substantial.
Plus, it should further insure that the stairs won’t heave during the frost/thaw cycle.
If you set aside the rotting part, there wasn’t anything terribly wrong with the concept of the old wood stairs.
They were okay.
But why have okay when you can build these beauties?
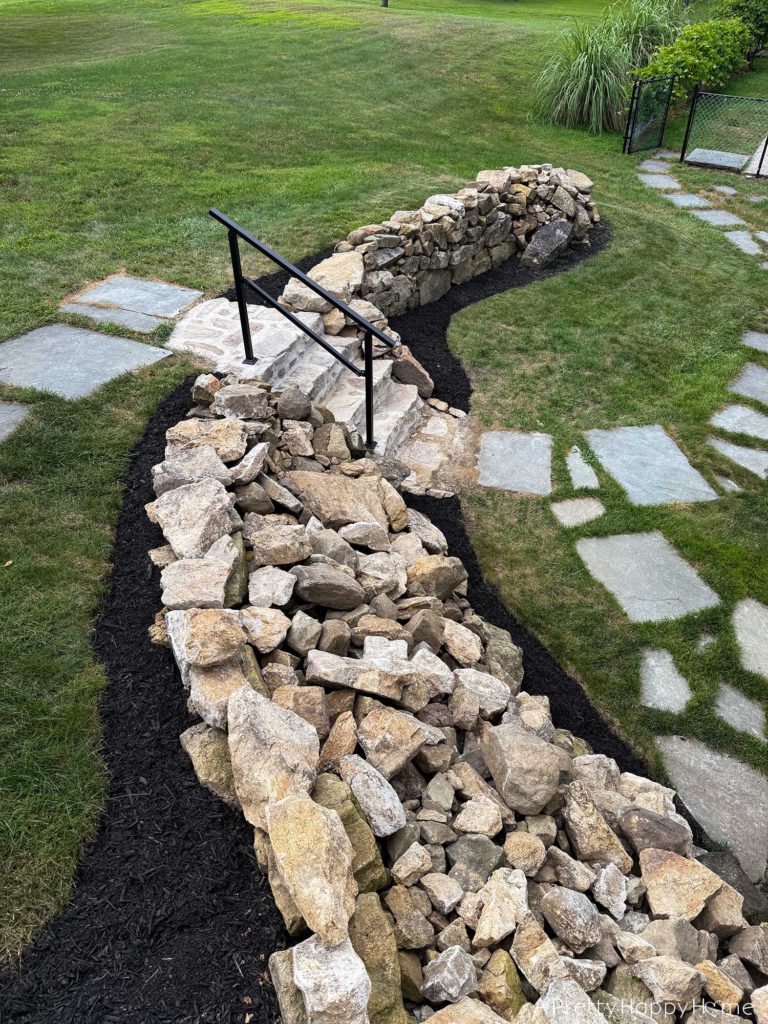
You know it’s only a matter of time before we redo the walls on either side of the stairs, right?
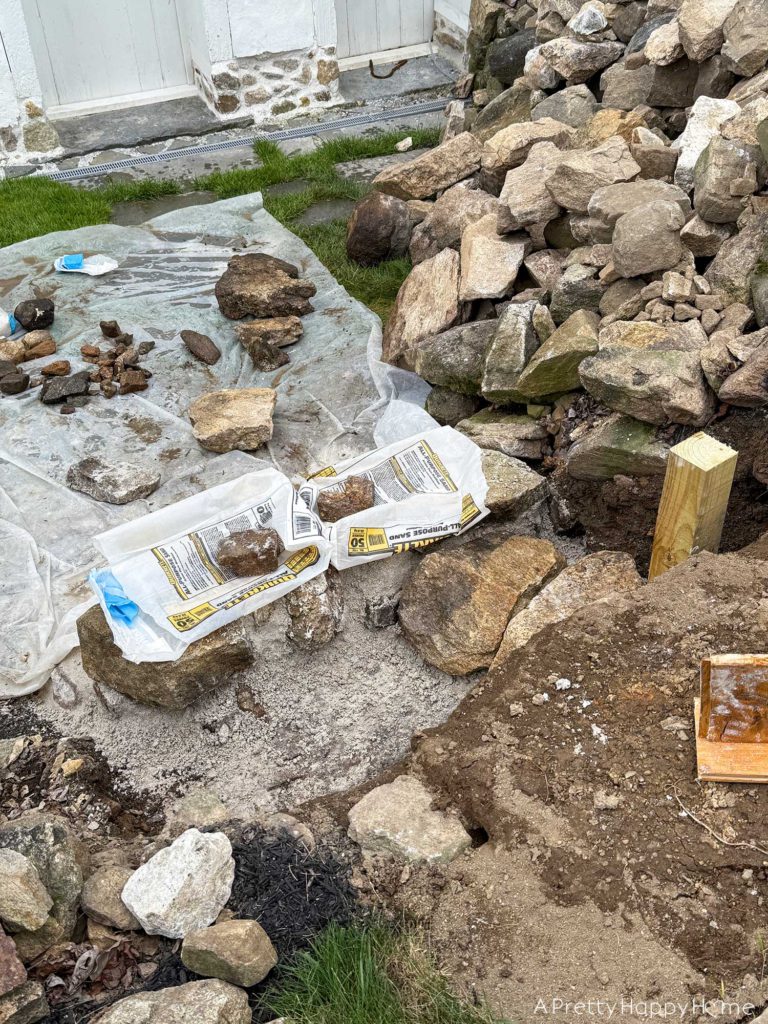
But maybe we’ll wait for the grass to grow back in between the base of the stairs and the flagstone path first. This project was a little hard on some of the grass even though we tried to protect the area as much as possible.
One thing you can count on – the grass and weeds coming back. Just maybe not fast enough for a blog post.
I chose a black metal handrail for maintenance reasons and because it ties in well with the other black accents we have in the surrounding area.
This did end up being a compromise situation in terms of what wouldn’t break the bank. I’m fine with how it looks, but I’m not confident that the way it is constructed will stand the test of time. However, I’m content with this one for now, but I’m adding a different railing to the things I’m idly looking for while going about my life.
Speaking of breaking the bank, how much do you think this project would have cost if we had hired it out? Keep in mind that the two of us worked on it for about 4 solid days. Would it be below $7,500 or above?
Do you want to know how much this 4-step fieldstone stairs project cost us?
I hope you’re sitting down for this.
We have about $350 into sand, lime, and the handrail. Talk about a big transformation for our time and dollar!
Sand was the biggest cost, since we used 22 bags or 1,100 pounds. The fieldstone was free, so that brings our cost down by at least $500 since we have an easy ton or more of fieldstone placed in these stairs. The fieldstone is all adhered with lime mortar and we used two (maybe 2.5) bags of NHL5 lime.
The even better news is that we’ve hardly made a dent in our fieldstone stores, so we have plenty of rock leftover for more projects.
What do you think of our fieldstone stairs? Did we class up the backyard? Do you have questions about the process? Let me know! You can do so by leaving a comment on this blog post, emailing me here, or reaching out via direct message on Instagram or Facebook.
I also have a “stone stairs” highlight saved to Instagram if you want to watch the entire process unfold.
Happy DIYing!
P.S. I’m not linking the handrail because while it’s not bad, I don’t love it with every fiber in my being. If you do want a link though, reach out and I’ll get you the source.
We get our lime from Limeworks.us in Pennsylvania. They do not know who I am, except maybe as the lady who showed up in a dress that one time to buy bags of lime. Haha!
Thanks for coming along on this journey. It was one of our faster endeavors! Here are some even quicker reads.
How I Styled My Latest Thrift Store Finds: Part 8
$6 Update! How to Add Trim to a Metal Door
*affiliate link in this blog post*


8 Comments
Laura L
It looks so awesome! I never can believe the things you and HH can do when you set your mind to it. Now I am waiting with bated breath for all the snakes to get evicted from the rest of the pile when you make walls on both sides. LOL. Also, now that you have this beautiful (looking anyway) black handrail, you will need to paint the fencing around the door to the carriage house to match. 🙂 Then you can put on the copper caps with solar lights in them. Talk about escalation! But, that is always how it works. P.S. Great job!!
annisa
Thank, Laura! I have been thinking about those solar caps. I haven’t forgotten!
sandy smith
I love the new stairs. It goes wih the era of your home. I also like the idea of painting the railing on the carriage house black. It will tie things together. Keep posting all of your projects. I love reading about them.
annisa
Thank you! I’m so glad you like reading about them. I love sharing.
Donna via Funky Junk Interiors
Incredible! That 300 pound rock could have shut me down pretty quick! I think you can thank your previous rockwork for giving you the strength to lug even heavier and MORE! Yay? Can’t wait to see what’s next…
annisa
Yay with a question mark is right. HA! Thank you so much. I’m excited to see what’s next too, since I don’t know what it is.
Nancy B
Those sharp rock edges are amazing, good job picking out just the right rocks! While we do live on pretty flat property (we irrigate, after all) it lacks the “character” of yours. The uses you’re putting all that free fieldstone to is awesome!
annisa
Thank you!! It feels very rewarding to use what we have and make something special, unique and hopefully lasting.