Mini Kitchen Makeover After 5 Years – How Has It Held Up?
Home makeovers are fun, but what I really want to know is how your makeover has held up over the years. That’s why I’m sharing how our mini kitchen makeover is holding up after 5 years of extreme use.
It’s five and a half years, technically speaking, but that’s not as catchy.
When I say extreme use, I mean this kitchen is put through the wringer. We rarely eat out. We work from home. We were holed up in this house during a pandemic. We’re still holed up in this house because we like it here. We do a lot of DIY projects, so we’re always tracking dirt in and washing up in the kitchen sink. Our teens have learned how to cook the basics. Have I mentioned the crafts?
Needless to say, this kitchen has SEEN some things.
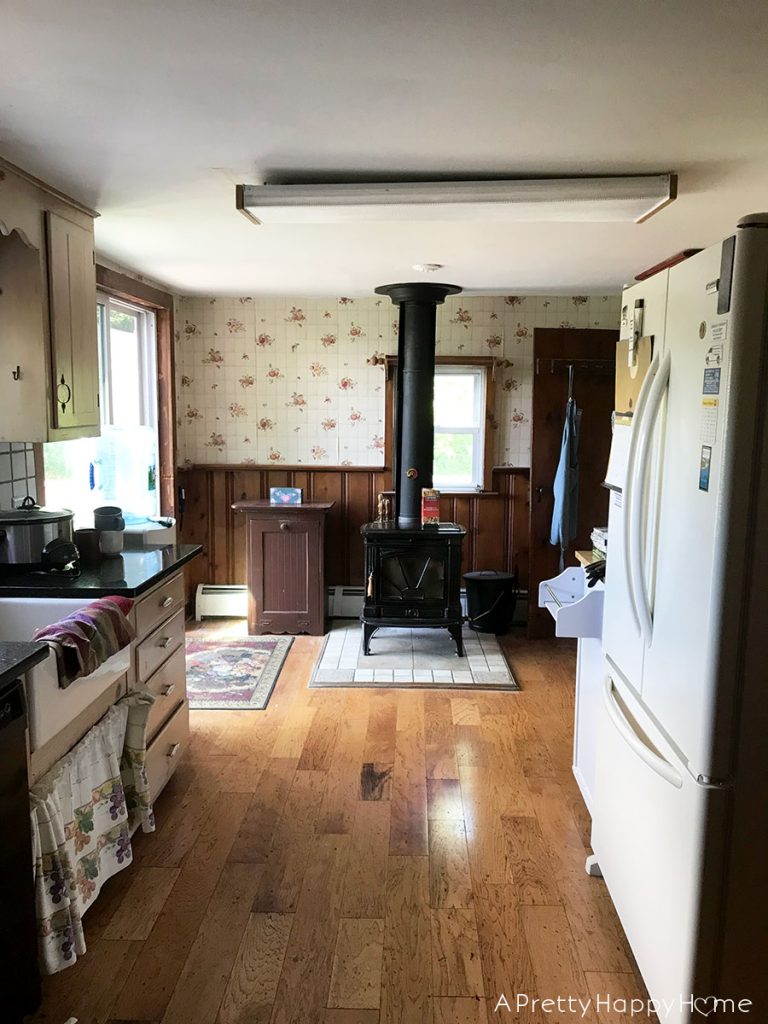
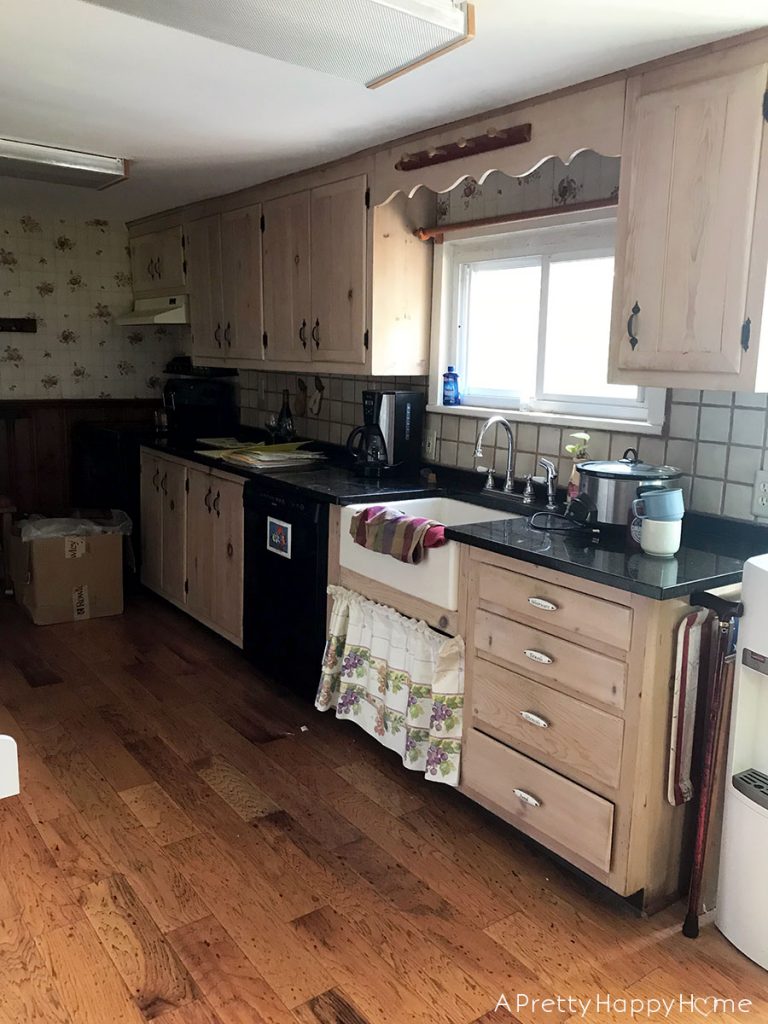
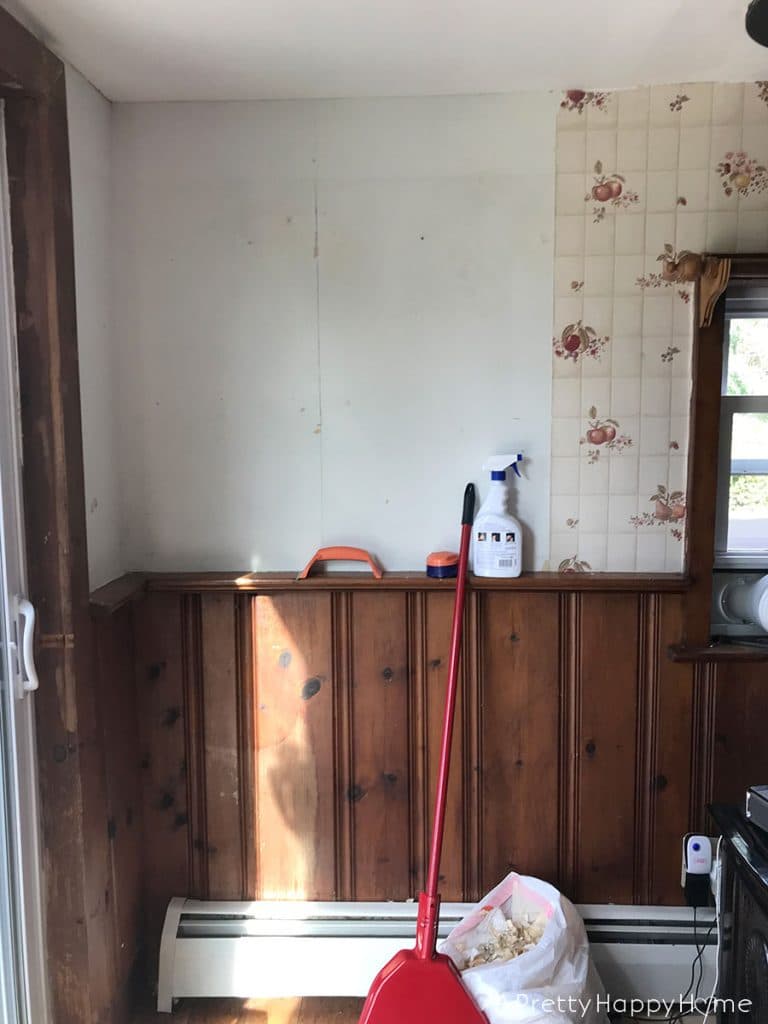
Below is a photo of how the kitchen looked before we did the mini makeover. It, and the next photo, were taken on the day we moved in. This is not our stuff. This is how the house was left for us. Magnets on the fridge. Food IN the fridge. Aprons on the back of the door. It was a teensy bit eerie.
To be fair, in the interest of making sure the deal closed, I did tell the elderly homeowner, who was not in good health at the time, that he could leave the things he did not want, and I’d take care of it.
It must have been a relief for him because, by golly, he sure did take me up on my offer!
But! There was a silver lining. We did use the left-behind coffee pot and slow cooker for years until they broke. I still have that kitchen towel. Hahahahaha!
I forgot there was a peg rail above the kitchen window. I still don’t know why you’d need one there.
The cane in the bottom right corner was the one thing I was worried the previous homeowner would miss, but he never did call and ask for it.
Anyway, this trip down memory lane just reminds me how much I blocked out about those first couple of weeks after closing. Aside from the piano, Handy Husband and I did the entire move ourselves. It was an all-consuming task of moving ourselves in and someone else out.
Fast forward a bit in time, and gutting this kitchen was not in the budget, but a mini makeover was possible. By mini makeover, I don’t mean it didn’t require work. It did, but it was all cosmetic changes.
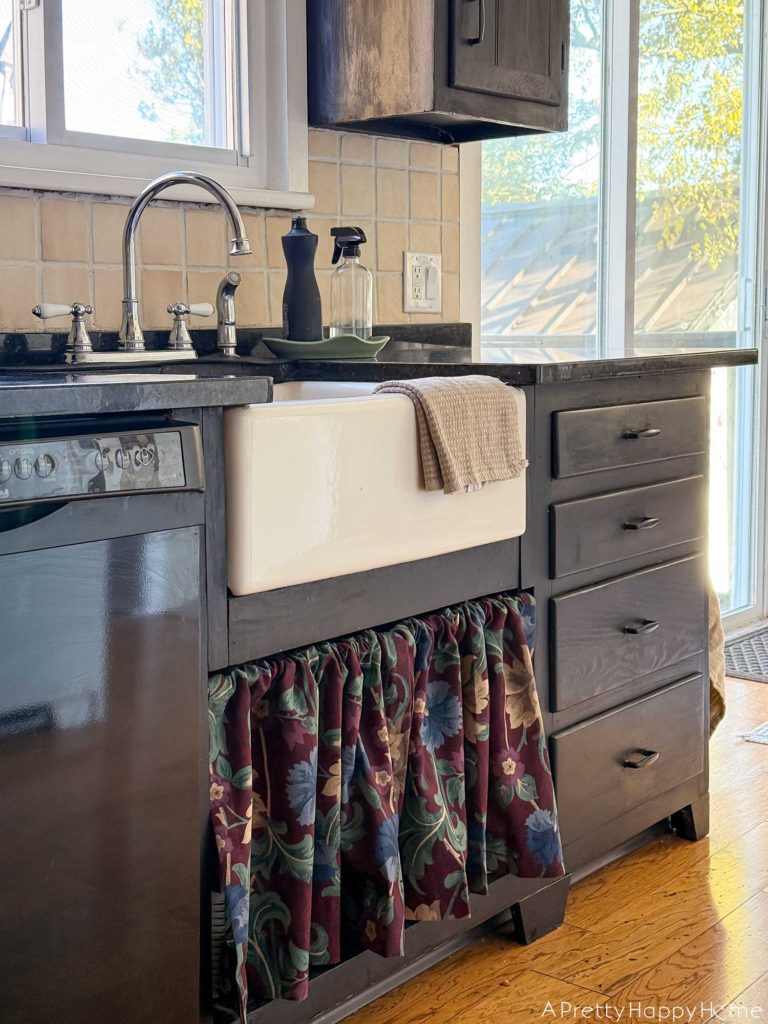
I used Grout Renew to change the color of the backsplash grout from terracotta to white. I cannot say enough good things about this grout color-changing product. I’ve used it in multiple houses. You can scrub spaghetti sauce off your grout, and it doesn’t budge. It might take two coats to go from dark to light colored grout, though.

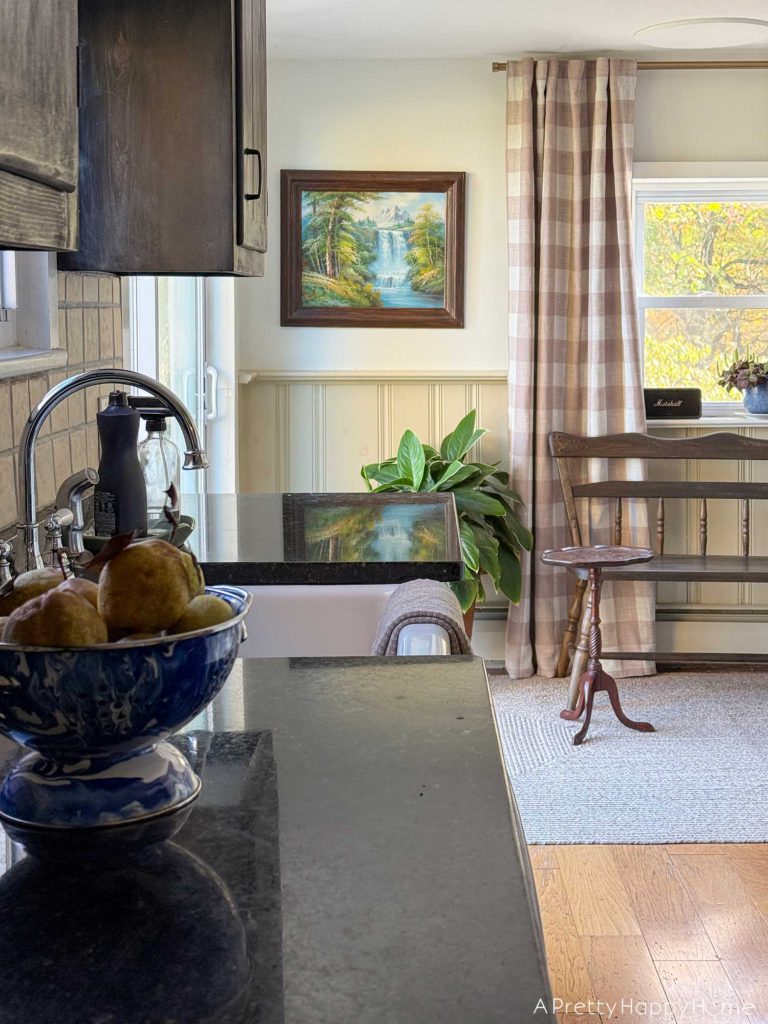
I stripped the wallpaper and painted the wainscoting.
The knotty pine was fine, but it was giving off ‘cabin in the woods’ vibes, not ‘farmhouse in New Jersey that George Washington could have visited’ vibes. This wainscoting is old, but not old-old if you know what I mean.
In addition, the trim throughout the rest of the house was painted, so I didn’t feel bad about painting anything in here.
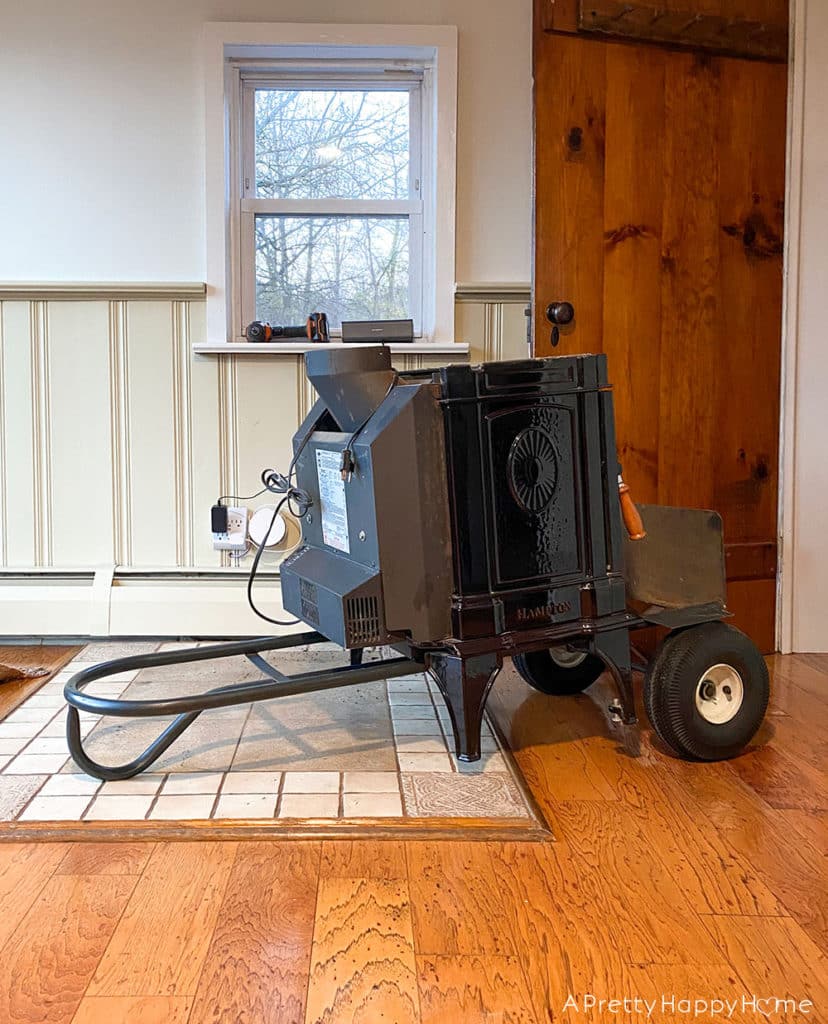
A little later in the story, we also removed the woodstove.
We never used it. The installers cut a hole through a roof truss to install the stovepipe. The roof leaked above this area. The most important reason for removing it was that I was terrified someone would fall down the stairs and slam their head on the stove. That someone would probably have been me. The stove was THAT close to our back staircase.
Oh, boy, was this choice controversial. So many people said we’d regret removing this woodstove that we never used. It’s not that I find pleasure in proving people wrong, but I can assure the concerned parties that do not know us personally or have never visited our home that we’ve had zero regrets.
Keep in mind that this house has not one, not two, but three fireplaces. If we really want to burn wood for heat, we can fix up one of those.
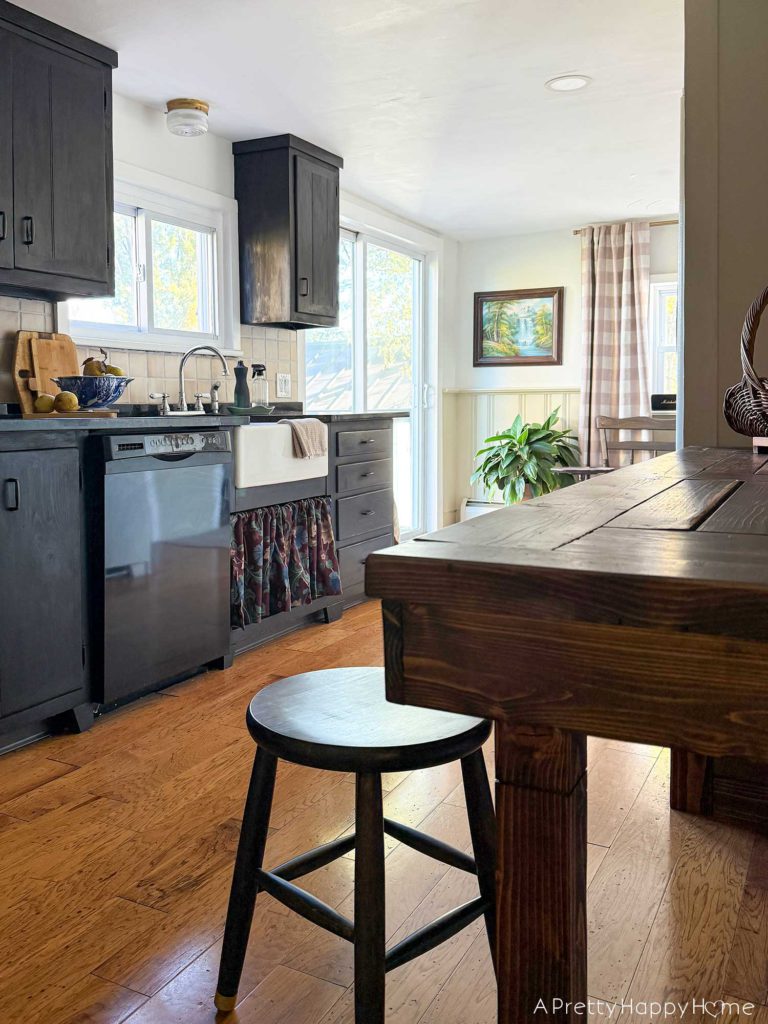
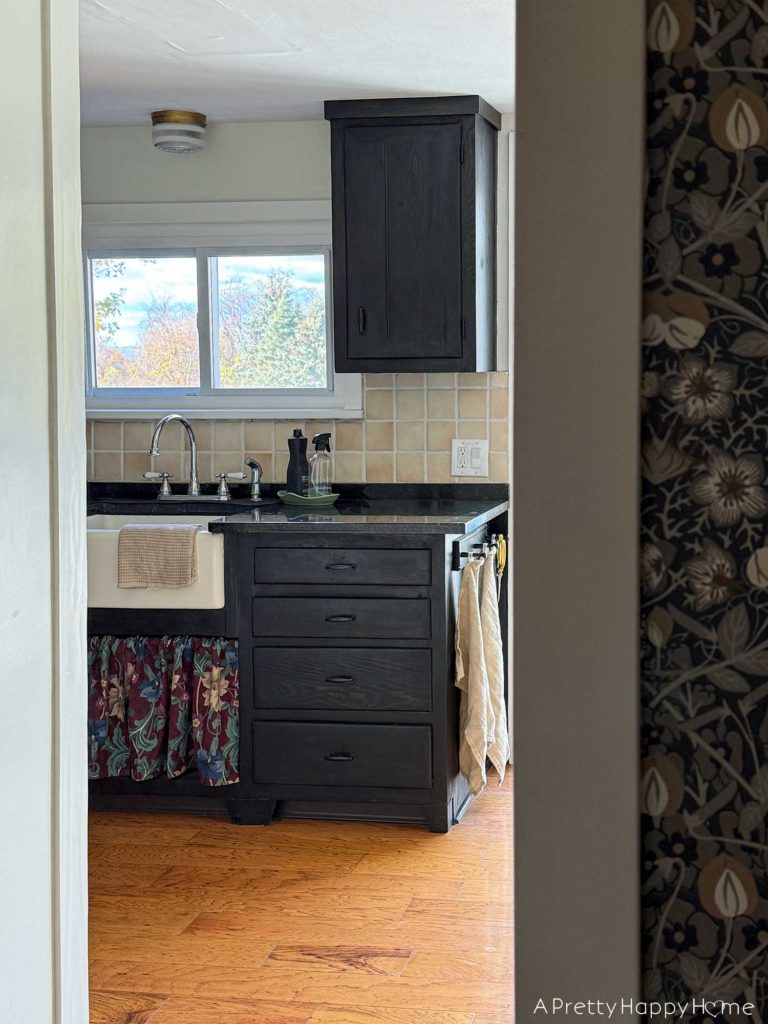
I also sanded the cabinets, added cabinet feet, and stained everything black. Staining was easier to manage than paint.
I chose black for the cabinets, not because I love it so much, but because I wanted to make the existing black appliances disappear. I couldn’t literally make them disappear because new ones weren’t in the budget, but I could make them visually less noticeable.
Another thing we made less visually noticeable, by hiding it behind trim and cabinet doors, was the existing exhaust fan. Unfortunately, from an auditory perspective, it’s still VERY much noticeable. Have you ever heard a plane take off in the middle of a thunderstorm while every baby born that year is crying? It sounds a little something like that, and it doesn’t even work all that well.
Sometimes I wonder why I get agitated while cooking, and then I turn off the exhaust fan and suddenly I’m fine again.
Last year, we did box in the refrigerator opposite this wall of cabinets, but I’m not focusing on that in this blog post because we haven’t lived with that DIY long enough to see how it will hold up for the long term.
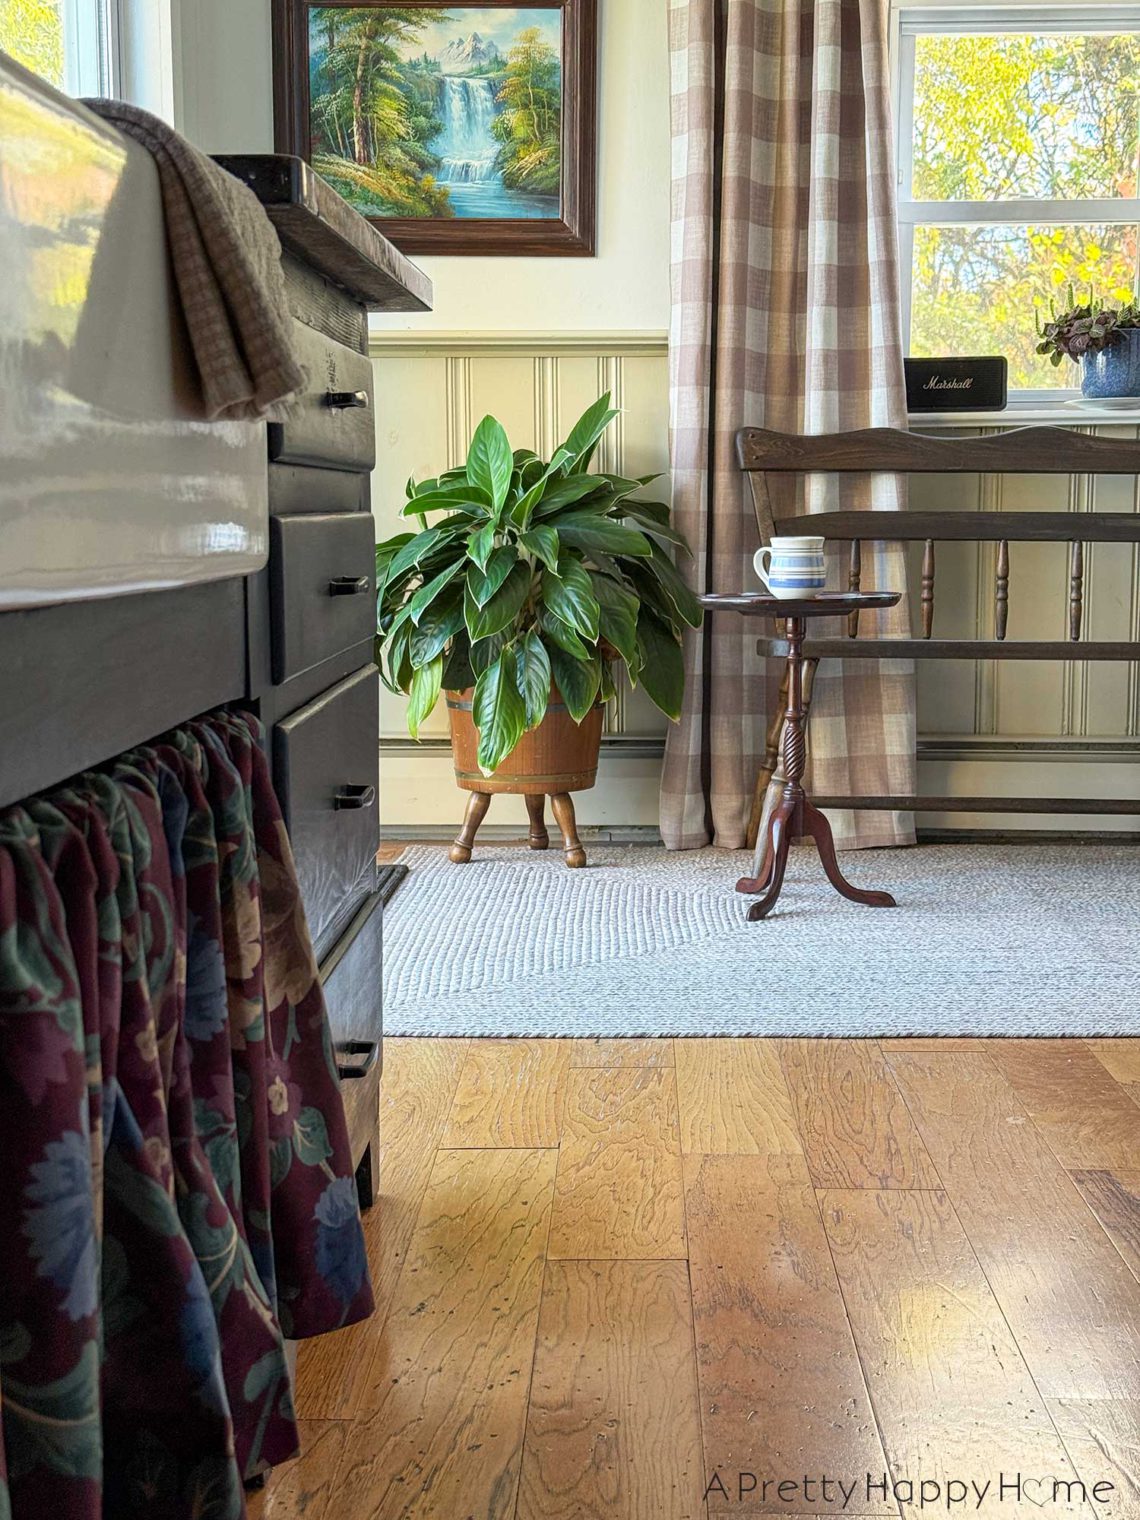
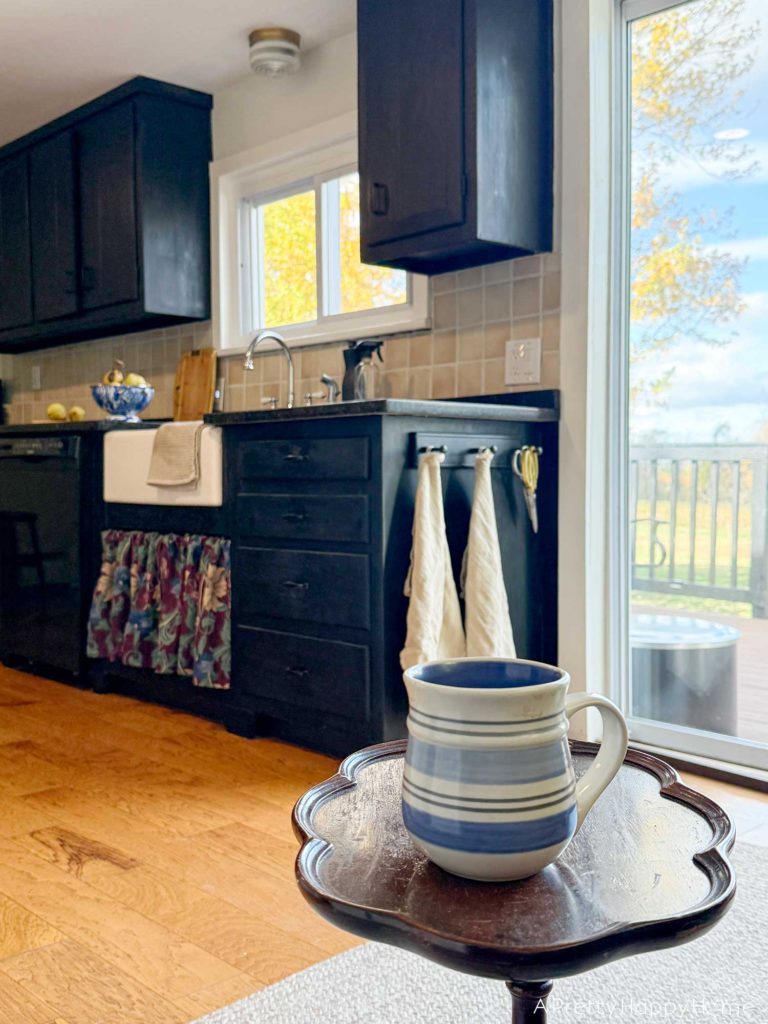
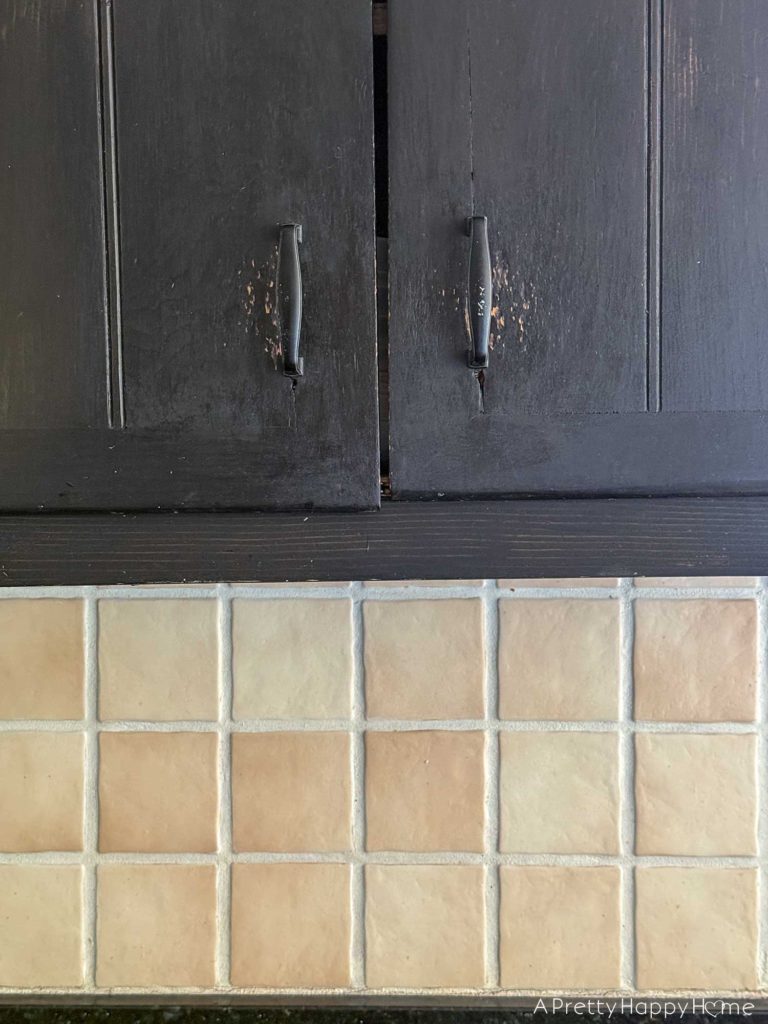
The black cabinets, on the other hand, have some things to say. The photo below was taken in October 2025. Don’t mind the wonky tile situation. Something (probably multiple somethings) isn’t level.
Anyway, from a distance, it looks fine. But that’s not the real test.

Up close, you can see that the cabinets have become chipped behind the cabinet pulls.
A few of the most-used cabinet pulls are also showing signs of wear. I didn’t plan on living with these cabinets, not to mention the cabinet pulls, for five years, so I wasn’t concerned about quality at the time.
Joke is on me, though, because priorities have changed, and we still don’t have plans to redo this kitchen any time soon.
I also have to laugh because we reused the existing cabinet hinges and screw holes, and obviously, they were never lined up quite right. Big gap in the middle. The left one is a little lower than the right.
In an old house like ours, that misaligned cabinet door is the least of my worries.
Once a year or therabouts, I touch up the three or four most-used cabinet doors that take the brunt of our daily use and get dinged up around the pulls. Silverware drawer, I’m looking at you!
I never sealed the cabinets, so that contributes to the issue. Maybe factory-finished cabinet doors don’t need as much maintenance? I haven’t lived with new cabinets in so long, I can’t even tell you what’s normal.
I recently heard a painter say you’re not supposed to curl your fingers around a cabinet pull. You’re supposed to pinch the sides of a pull to open a cabinet door. The pinch technique means you aren’t getting oils from your skin on the cabinets or gouging them with your fingernails.
Uh, oh. I’m completely guilty of doing that. It’s going to be hard to break that habit.
Other than that, I’d say the cabinets have done well.
Even the granite countertop that we GLUED(!) together because it was cracked around the sink is still holding. We used construction adhesive to glue the broken parts together. I also have black caulk in a visible crack.
Earlier this year, I thought for sure that the countertop was a goner because a new part of the granite broke off by the faucet. But we glued that back on, too.
I grew up on a farm where it was normal to fix any number of things with duct tape and baling twine, so I come by this type of repair naturally. It may not be classy, but it is resourceful.

We’d like to renovate this kitchen on our timeline, not on the house’s timeline.
If we get new counters, that means a new backsplash. Before you know it, we’ll have new cabinets and appliances because our projects always escalate.
So we pray that the glue holds a little longer.
Here are the grades I’d give this mini kitchen makeover after 5 years of daily use:
Stained Cabinets: B
Recolored Grout: A+
Cracked Counter: F
Glue Holding the Counter Together: A-
Cabinet Feet: A (Instant upgrade to any kitchen. Securing them the best way you can is key.)
My Nemesis, the Exhaust Fan: F (Should have replaced it years ago.)
Painted Wainscoting: A- (One part by the stove gets too much steam heat.)
The moral of this story is to do the mini makeover. It’s not time or money wasted to make your home a little more functional, a little easier on the eyes, or a little more you.
You could be like us, and five months has turned into five years in the blink of an eye. I might not have my dream kitchen, but most days, I appreciate and enjoy what we do have. I’m proud of us for working with what we have to make a space that is warm, inviting, and truly unique. I’m glad I haven’t been living with an eyesore for the past five years. That would have been a drain on my creative soul and really made me not want to cook dinner.
How do you feel about mini makeovers? Do you like to see how people’s DIY projects hold up, too? I have time, so tell me everything. Comments really do make my day. You can comment on this blog post, email me here, or reach out via direct message on Instagram or Facebook.
Happy DIYing!
P.S. I almost forgot. We stopped using the dishwasher about 4 years ago. It was leaking, and I think the dishwasher is the least helpful appliance, so I didn’t care about replacing or fixing it.
We hand-wash all our dishes. For the most part, we clean up after every meal instead of leaving dishes to pile up in the sink. I trained our kids that if they use a dish outside of dinner when there are assigned clean-up duties, they have to immediately wash, dry, and put it away themselves. No leaving it for someone else. That’s probably one of THE BEST parenting things I’ve ever done. They don’t even think about it anymore. It’s an automatic response.
Eventually, we will replace the dishwasher, but I want one that is panel-ready. This could be another domino that sets off a kitchen renovation.
I’m giving the dishwasher a C grade because it’s not a complete waste of space. I use it to store seldom-used pots and pans now. True story! Hahahahaha!
If you made it to the end of this long post, BRAVO! If you’d like another blog post to read, I’ve got you covered.
What We Found In Our Kitchen Wall – Copper tiles
Gross to Gorgeous Pantry Cabinet Transformation
*affiliate links in this blog post*


2 Comments
Pamla
Well I think you’ve missed your calling and this should become a parenting blog. No one I know has had that level of success training their children in kitchen matters 😉 least of all my grandkids…my daughter wants your phone number. I am all in on short term fixes and yes, they do often turn out to be for the very long term. Your mini makeover has served you well, especially in the emotional, creative areas. It has a lovely vintage charm especially the area where the wood stove resided and the refrigerator side of the room, so sweet and inviting. Love the apron sink and the curtain below it that references the Art Nouveau Wallpaper in the adjacent room. ❤️ and the peg rail…love a peg rail and an ol timey kitchen. Well worth the time, money and work. We have done similar mini makeovers in several kitchens (8!) working with hideous former owner choices. 😂 carpeted kitchens, bright yellow Formica cabinets, mirrored backsplashes, squirrels. It’s definitely a snowball effect when you start replacing things and calls for caution. We’ve done two brand new kitchens as well. The food tasted just as good either way. We’re presently doing a mini makeover of a large, ugly laundry room in our new place, mostly because I’m allergic to the laundry products used and stored there. Going real slow and I’m tired of wearing a mask when I do laundry. 😷
annisa
Pamela, The carpet and the squirrels caught me off guard. LOL! My favorite thing you said was “The food tasted just as good either way.” I will remember that sentence forever. You distilled the perspective down to what’s really important. I’m also so sorry that you’re allergic to certain laundry products. I’m not, but one thing I dislike is walking outside and being able to smell someone’s laundry detergent through their dryer exhaust. You can’t convince me that’s good. I hope your makeover is done soon so you can ditch the mask.