
I Refinished Our Tongue and Groove Closet Doors and It Could Have Gone Worse
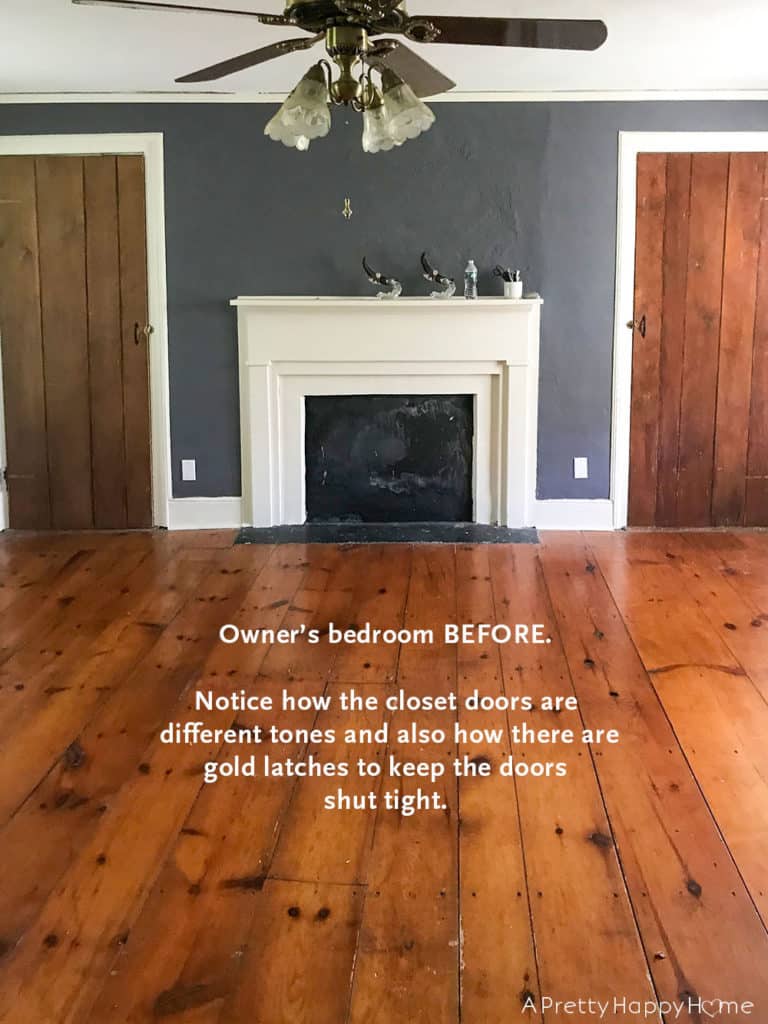
Our bedroom has original tongue and groove closet doors.
When I say original I mean roughly 200 years old.
I’d narrow that date down a little, but I’ve heard it’s rude to ask a door its age.
Actually, I just don’t have documentation. That’s why I’m throwing out a conservative round number for the age of the doors. However, I do know they are young at heart!
Anyway, when I had the bright idea to refinish these tongue and groove closet doors I didn’t factor in the small (tiny, really) detail that I am not qualified to work on doors that old.
Not. Qualified. No sirree.

These doors came from trees that were growing when George Washington was alive.
Imagine being a door that has borne witness to, among other things, the Civil War, Prohibition, WWI, WWII, the invention of Twinkies, the moon landing, and Janet Jackson’s wardrobe malfunction. After all of that, you’re still hanging there. Still doing your job of hiding people’s closet crud when those people remember to shut you properly, which they rarely do.
What’s the one thing you’re at most risk from if you are a 200-year-old tongue and groove closet door?
An amateur who thinks she can refinish you because she has a few DIY projects under her belt.
THE PRESSURE.
It’s not like if this all goes wrong I can just conjure up another set of 200-year-old tongue and groove closet doors.
Although, my scary attic looks like an authentic place for conjuring, so maybe I could try?
These were all the thoughts that I had as I touched my electric sander to the front of the first closet door. It was a barrage of “Are you sure you should do this?” brain signals.
I responded how any person receiving these types of alerts from their brain would.
I casually shrugged it off and asked myself “What could possibly go wrong?”
Then I proceeded to think of at least fifty things that could go wrong.
The funny thing is that none of those fifty things was the actual thing that went wrong.
The reason I even wanted to refinish these tongue and groove closet doors is that we updated the closet door with new hardware that looks older than the old hardware.
Did you follow that?
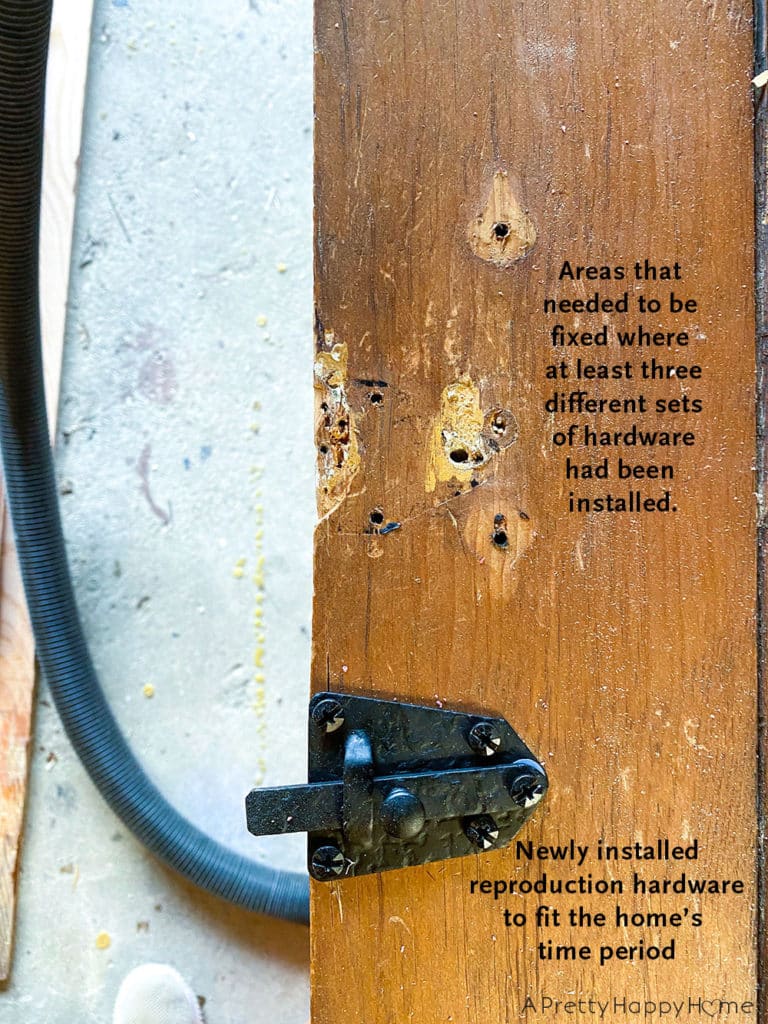
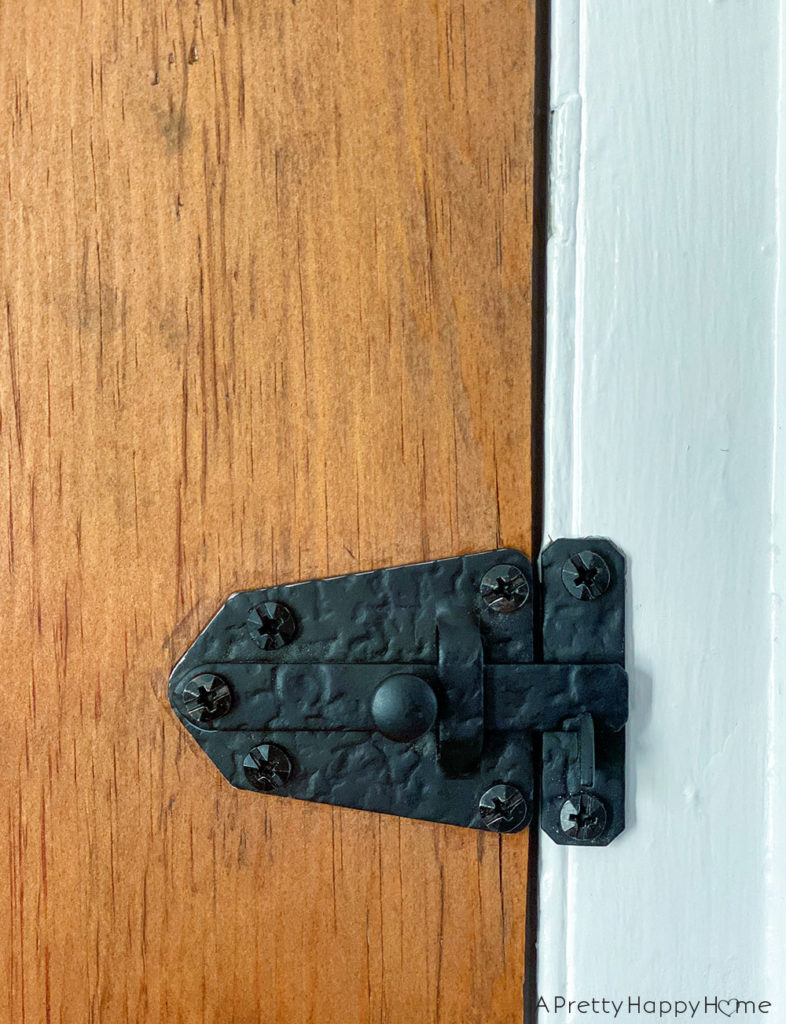
Basically, I’m on a quest to find and install historically appropriate door hardware on as many doors as possible in this house. In some cases that might be antique hardware, but in the case of these closet doors, I’m using reproduction hardware.
Reproduction hardware is newly manufactured hardware in an antique style. In the case of the newly installed door latches on these closet doors, it is an exact match to original hardware we found in the house.
You didn’t even have to look closely at these closet doors to see that the hardware had been changed more than once over the years. The doors were peppered with screw holes and discolored areas where old latches and hinges had been installed.
The closet doors were also different colors. This could have been due to differences in UV exposure since the doors are on opposite sides of the room.
All of these blemishes could be fixed with a little sanding, filling, and staining.
Right?
Right.
The sanding part went fine, or so I thought. My goal was simply to knock off the top layer of color.
I wasn’t trying to remove any of the natural imperfections like wood knots or those that that had occurred over time like dings and scratches.
In old house language, imperfections equal character.
We embrace character.

The problem with the refinishing process that I did not anticipate was the importance of adequate lighting to see what I was actually doing.
You’d think this would be obvious, but we’ve already established that this is amateur hour.
The lighting in my basement, where I decided to do the staining and sealing portion of this project, is a little less high-definition television lighting and a little more dark, dingy dungeon lighting.
I simply was not aware of what was not illuminated by that one overhead bulb.
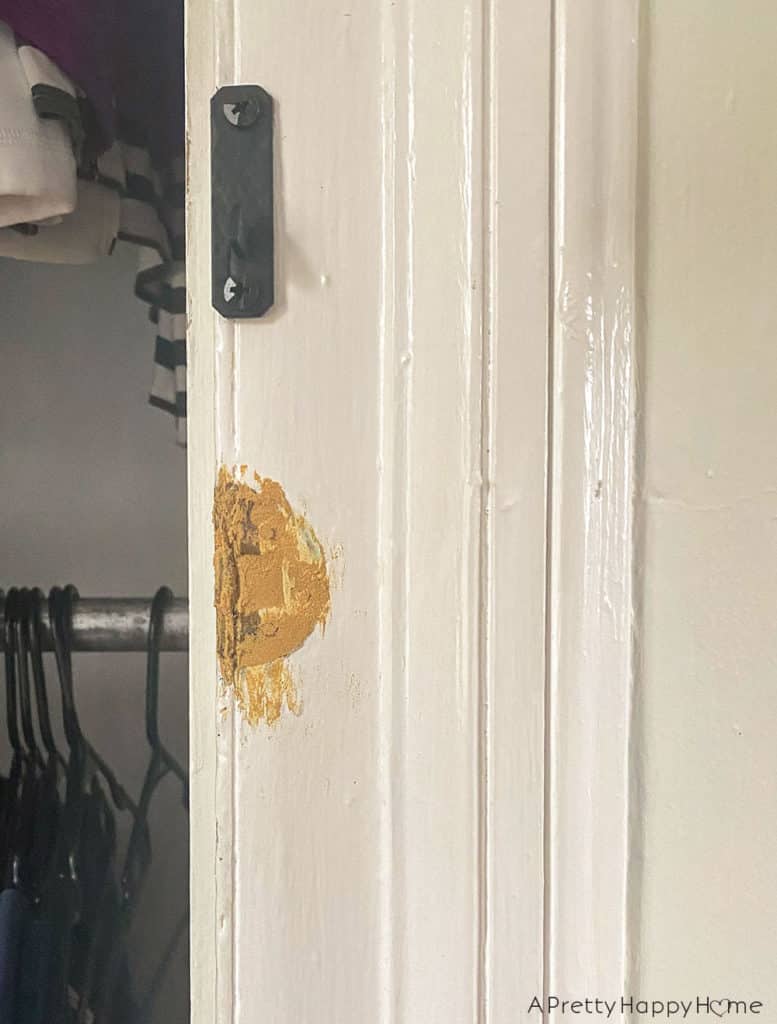
Specifically, some weird markings that the stain was bringing out in the wood on one board on one of the doors. That same board also caused me problems when my overconfidence let me to try and fill in a really large hardware divot. I did not match the wood filler color to the door correctly.
Basically, 1/5 of a tongue and groove closet door caused me problems.
Whether or not I would have tried to correct those problems if I’d brought an additional light down to the basement is unknowable.
I’d like to assume that the better angels of woodworking would have come to the rescue though.

Objectively speaking, I know these tongue and groove closet doors look one hundred times better now. I’m happy I didn’t truly mess them up and the reproduction hardware functions well and looks so good in person.
Perhaps more importantly, I’ve learned a few things for the next time I attempt a project like this. After all, these aren’t the only original doors in this house that could use some love!
Resources Used to Refinish These Tongue and Groove Closet Doors:
Minwax Special Walnut Stain (Normally, I find special walnut to be a pretty neutral-toned, brown stain. Not too dark, not too light. In the case of this old wood, it reads a little orange, which isn’t my usual experience with this color. However, it worked out well because it matches the floors in this house.)
Minwax Antique Oil Finish (This was really easy to work with. It didn’t produce so much of a sheen, but gave the wood doors a nice, soft look.)
Acorn Arrowhead Hammered Door Latch
*affiliate links in this blog post*
Have you ever completed a DIY project in less than ideal conditions and later regretted it? I’d love to hear your stories. You can always email me here or reach out on Instagram or Facebook.
Thanks for being here today! I hope you enjoyed today’s blog post. If you’d like another one to read, I can help with that! Try one of these:
Yes, You Can Totally Refinish Wood Chairs Without Power Tools
DIY Kitchen Cabinet Feet from Scrap Wood


You May Also Like

Caulk, Cracks, and Home Maintenance. Oh My!

Colonial Farmhouse Kitchen Mini Makeover One Year Later
