10 Tips For Building An Outdoor Ping Pong Table Using Cement Board
If you’re thinking about building an outdoor ping pong table using cement board for the top to keep it weather resistant then I have some tips for you!
We recently built an outdoor ping pong table and learned a thing or ten along the way that, so far, the collective genius of the internet has not addressed.
We hope that our experience building an outdoor ping pong table using cement board will help your build go a little bit easier so that you can get to the fun part – playing ping pong – a little bit faster!
By the way, if you’re wondering if the ball bounces well on the cement board, it does!
There are various plans on the internet for how to build an outdoor ping pong table using cement board. (We used these plans with some modifications because we were mainly working with the lumber we had on hand.)
Our tips for building an outdoor ping pong table should help regardless of whether you are exactly following plans, modifying plans, or making it up as you go. Let’s get into it.
Tip #1: If you’re a perfectionist, this might not be the project for you.
I want to warn the perfectionists out there that turning cement board, a highly imperfect substance, into a tabletop can be a little maddening.
There’s not a great way, at least not one we’ve determined yet, to finish off the rough edges of the cement board. We aren’t complete perfectionists, but we do enough woodworking that we’re used to being able to make things look really nice and finished.
Halfway through this project, we were questioning our life choices and trying to decide if we should have tried to pour a solid concrete top (that’s too heavy for us to maneuver) or an epoxy top (but we were already invested in the cement board) because the imperfections of the cement board were driving us bonkers.
Ultimately, we just decided to let it be and see how it does. Guess what? So far, so good. Plus, the kids playing on the table don’t seem to care or haven’t noticed the imperfections that we see.
Just be forewarned that this project might make the perfectionist inside of you twitch a little.
Tip #2: Stain or paint the table base before attaching the top.
Unless you’re a contortionist for the circus, do yourself a favor and paint or stain the table base before you install the top. Your back and neck will thank you later.
For that matter, if you’re going to paint the bottom of the cement board top, do that before installing it too.
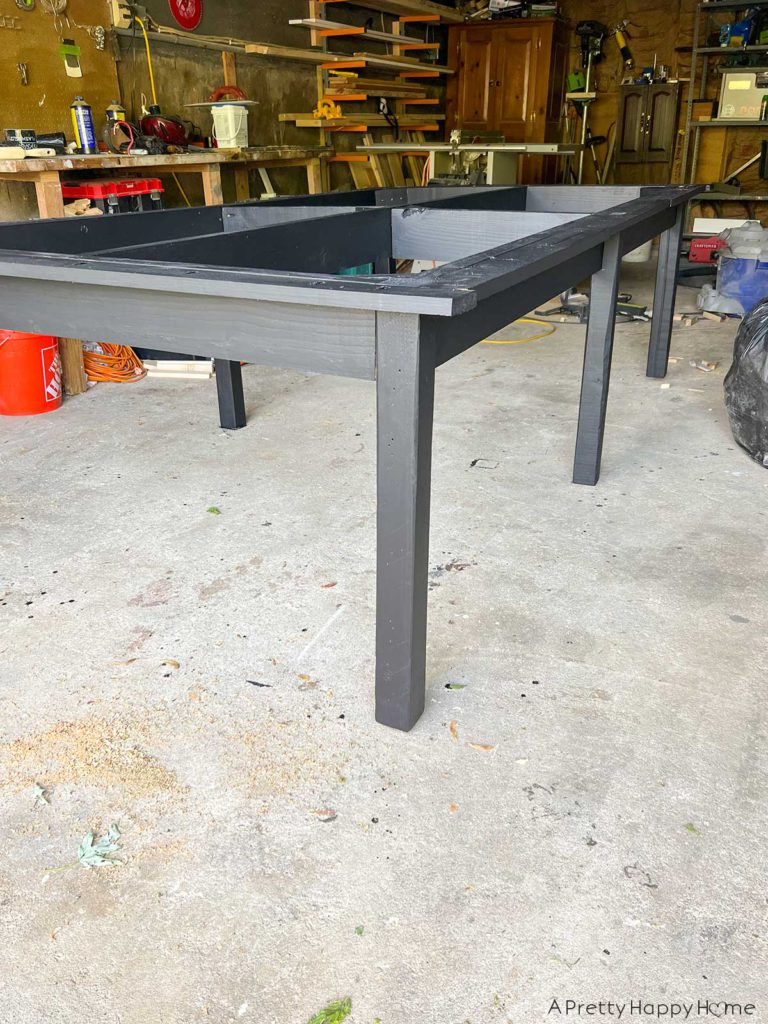
P.S. We used an exterior solid color stain to seal our wood table base.
Tip #3: Add support under the seams where the cement board joins together.
The plans we followed did not call for any wood supports directly underneath the seams where the cement board butts together.
We added wood supports, after the fact, for two reasons. First, one of our cement boards was slightly bowed and there was no way to bring it back down to level without having a wood support underneath it. Second, if anyone leans directly on those seams, it could be a point of failure for the tabletop.
Pictured below is the t-shaped support that we built and screwed into the table base frame. In addition to screwing the support into the frame, we added construction adhesive to the top of the support to secure the cement board to it. Be sure and have something heavy on hand to weigh the cement board down while the construction adhesive dries.

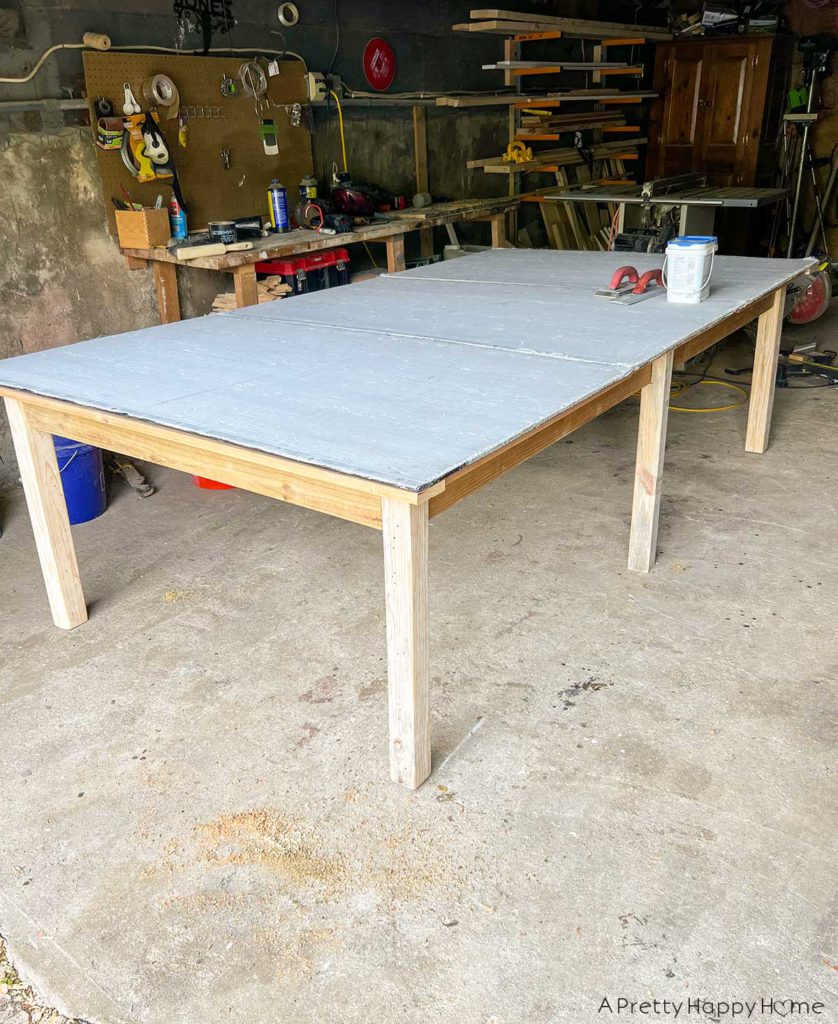
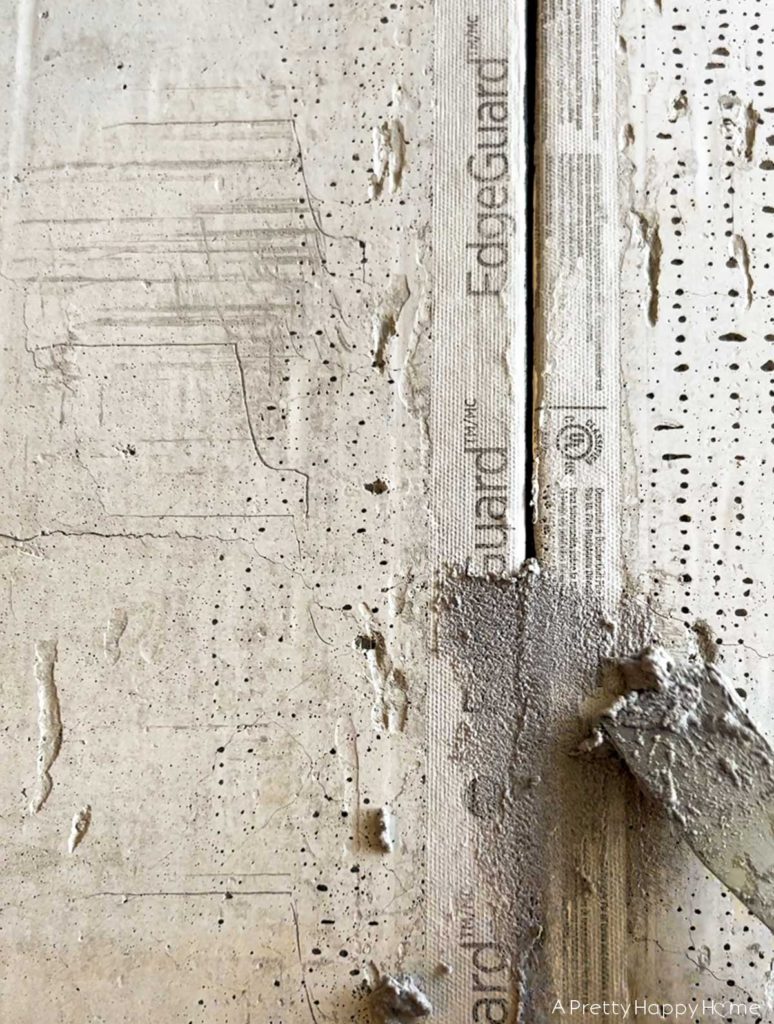
Tip #4: If the seam between cement board sheets bothers you, you can fill it.
If you’re using three 3×5 sheets of cement board for your ping pong table top, you’re going to end up with two seams across the table. The plans we were following left the seams open. If they don’t bother you, you can leave them.
The seams are actually placed at an ideal spot on the table, meaning the ball isn’t likely to land directly on one of the seams during casual play.
Remember, our inner perfectionists were struggling at this point in the build. We chose to fill our seams in with premixed grout that we had on hand, but a mortar mix of some sort would be much better. The grout has a grittier texture than the cement board, so you’re going to notice the texture difference. We ended up having to sand it down a little with 80-grit sandpaper to make it flush with the surface.
Despite the extra work, we are glad that we filled in the seams. It looks good. It functions well. Plus, water can’t slip between the seam now and pool on the wood supports we installed underneath the seam.
Tip #5: You can fill big pockmarks in the cement board if you want.
Cement board has a rough side and a smooth side. We used the smooth side for our ping pong table top. However, there are still going to be pockmarks on the cement board.
If they aren’t big, do yourself a favor and leave them be.
We had a couple of bigger (2-inch) pockmarks or gouges that we wanted to fill. We used grout but, again, a mortar mix would be better. Then we got carried away and started filling in more of the pockmarks. This was probably unnecessary and created more work for us because then we had to get the tabletop smooth-ish by sanding it. We blame our inner perfectionists!
Tip #6: Plan ahead if you are going to need to disassemble the table to store it.
The upside of buying a premade ping pong table is that they usually fold in half for easier storage.
This is not the case with a DIY build unless you’re doing some serious planning ahead. The way we built our outdoor ping pong table, especially by glueing the top down, it is not coming apart into smaller sections for compact storage.
Not sure if this will be a problem yet or not.
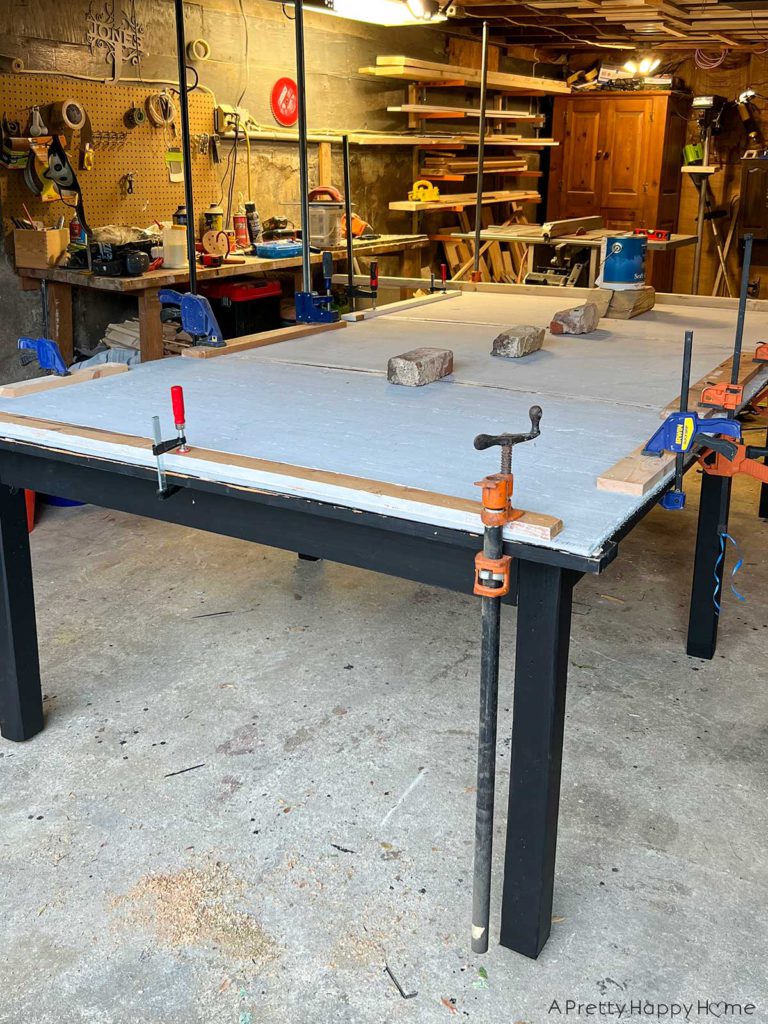
Tip #7: Have clamps on hand.
If you’re like us and choose to glue your cement board down instead of screwing it down, you’re going to need a lot of clamps to secure it in place.
We ended up using 16 clamps around the table plus the addition of some scrap wood so that the pressure from the clamps was evenly distributed. In addition, we distributed weights down the center of the table.
Tip #8: Seal your tape lines.
Instead of painting the table lines last, we used white paint suitable for concrete and masonry as the base layer. A primer that is compatible with concrete would work well too.
Then we marked the lines of our table using 1-inch painter’s tape.
Take the time to seal the edges of the tape with your white paint to get the crispest lines possible on this uneven surface.
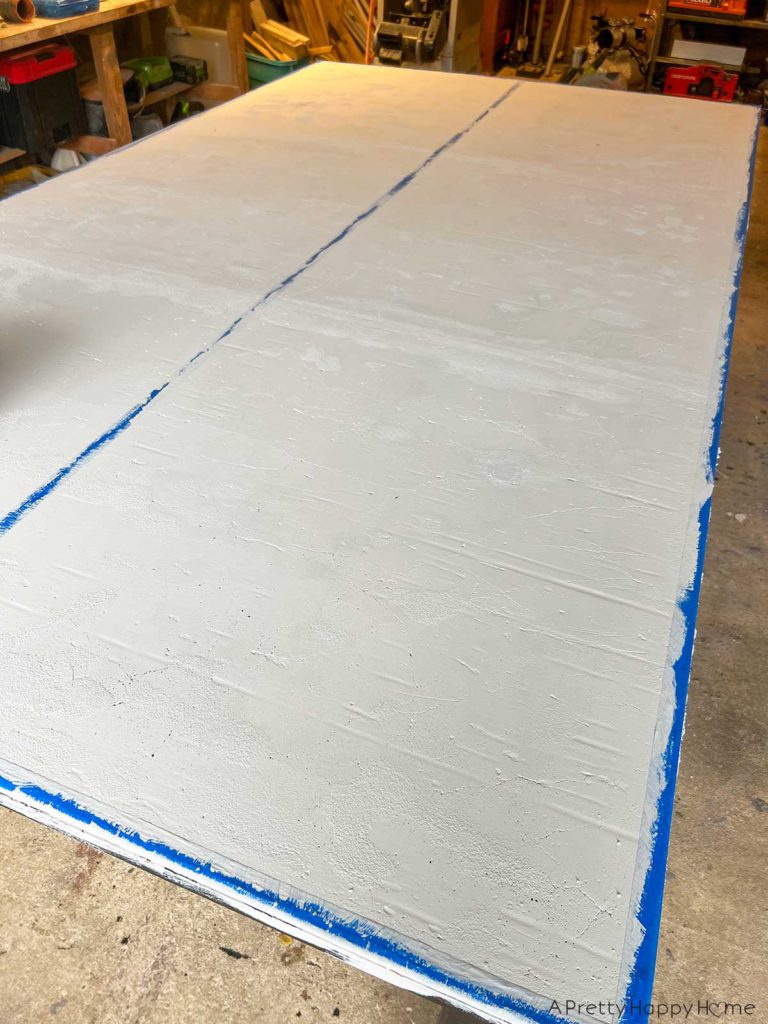
Then we painted over the white paint with the color we wanted our table to be. In this case, it was black but you might be painting a traditional green ping pong table.
The lines weren’t absolutely perfect, but they were pretty good. I only had to do a few touchups.
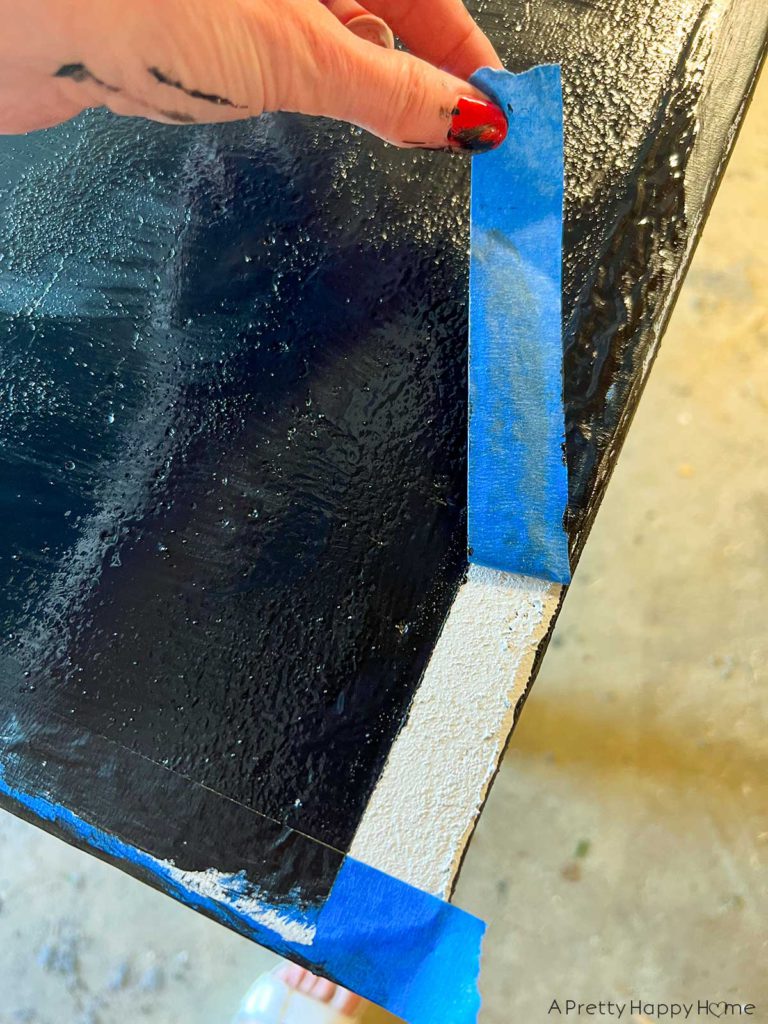
I ended up doing one full coat of white paint, one partial coat of white paint just where the table lines were located, and three coats of black paint.
It was a bit tricky to try and get the paint down inside all of the pockmarks.
The black paint we used was exterior house paint. I did notice a few marks on the table from the ball after the first few hours of play. I don’t think we let the paint cure long enough before we started playing. We only waited 5 hours.
At the time I’m writing this blog post, we’ve been using the ping pong table daily for 2 weeks and the paint seems to be doing really well. No new marks. It’s going to take a full season to know how the table really stands up to regular use and the weather though.
Tip #9: Have a way to level the table if using on grass and think about how you’ll move it to mow the lawn.
Even if you think your lawn is level, it’s probably not. We ended up with a block of wood under one of the legs to level the table. Adjustable feet of some sort might be an option to consider as well.
If you use the plans we used to build your ping pong table, it is heavy! It took my husband on one end and my 13-year-old and I on the other end to move the table to the lawn. We are considering buying pneumatic wheels for the table to make it easier to move in order to mow the lawn. Unfortunately, the wheels would cost more than the materials to build the table, so we’re waiting to see how it goes.
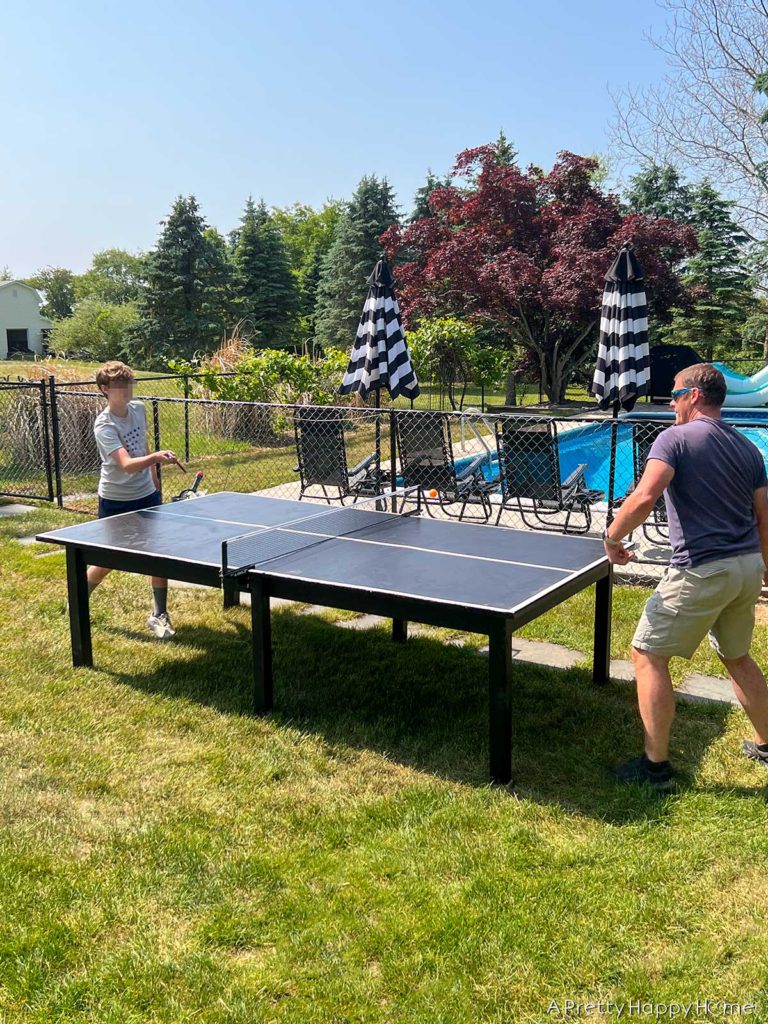
While setting the ping pong table in the grass presents some logistical challenges, there is one HUGE perk. You’re not going to have to chase the ball too far. It’s usually annoying to have to chase a ping pong ball all over a room but the grass stops the ball right where it hits the ground. It’s really nice.
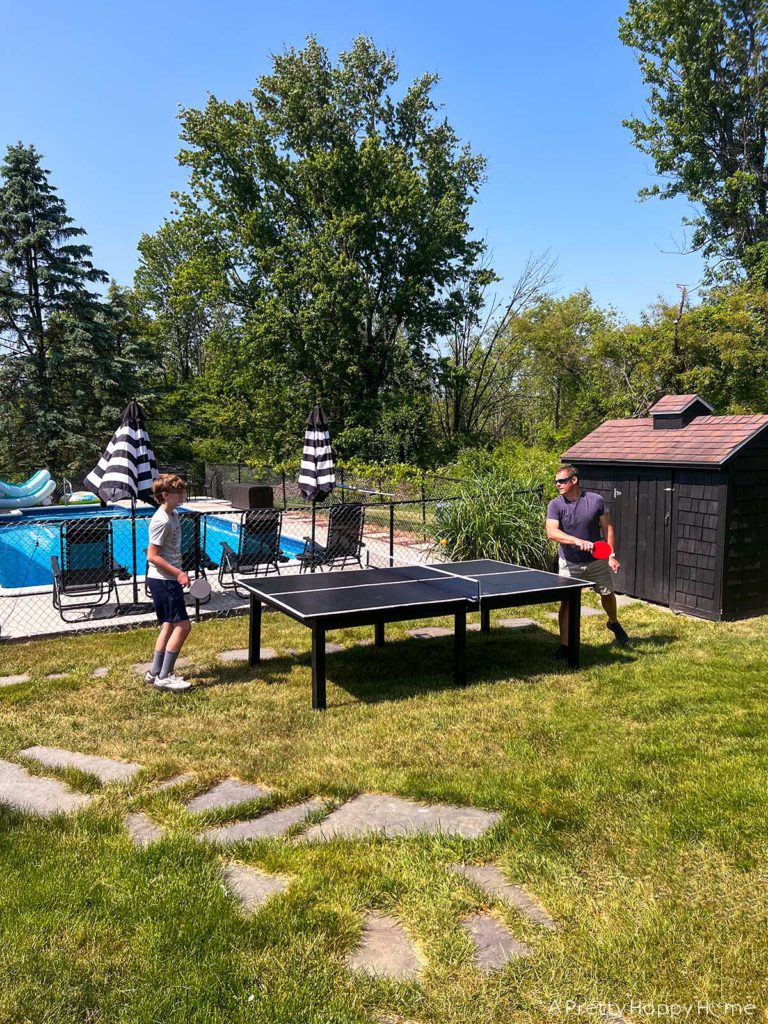
Tip #10: Customize the ping pong table to coordinate with your home style.
We ditched the green and painted our outdoor ping pong table black and white because it coordinates with and blends in well with our house and outdoor furnishings.
However, the sky is the limit on how you could paint your table. What about adding your favorite team logo to the table? What about giving the table an artistic mural treatment? If you’re using the table in a community space, you could let kids put their painted handprints on the table.
If you customize your tabletop in a fun way, we’d love to see what you create!

While we built this outdoor ping pong table for our teenagers and their friends, I think the adults enjoy it just as much. Ping pong seems to be a game that everyone loves!
Building this table was definitely a learning experience and we’d build it a bit differently if we did it over, but we have zero regrets about adding this to our backyard.
If you build an outdoor ping pong table, we’d love to see what you create. You can always email us here, or reach out via Instagram or Facebook. If you have tips to share with other folks considering building an outdoor ping pong table, please leave a comment on this blog post and we will keep a running list going.
Thank you and happy building!
P.S. We have this ball and paddle set, which comes with a holder that you can hang on the wall to keep the paddles and balls organized. The paddles have wood handles, so we store them inside our pool pump house. My husband and son do think the paddles could be grippier…I think that might be an excuse for getting beaten by Mom.
If you prefer plastic paddles that can get wet, try this set.
We also have this regulation-size net, which has worked out really well.
Thanks for being here today. Here are some other blog posts you might enjoy!
DIY Board Game Coasters – A Great Up-cycled Craft
DIY Rustic Towel Bar From An Antique Harness
Free Basketball Drills and Practice Plans for 4 – 6 Year Olds
DIY Over-The Door Wood Basketball Hoop
*affiliate links in this blog post*


You May Also Like

Trying Out An Electronic Lock

Over-the-Door Basketball Hoop with Wood Backboard